
AS4600 System Upgrade Application Note
Purpose:
This application note describes the upgrade procedure of PicOS installed on the AS4600-54T switch. Typical bare-metal switches usually come with 2GB or more of NAND Flash storage. In these switches, PicOS creates two repositories, namely the PicOS Repository and the Recovery Repository. The Recovery Repository is required for the automated system upgrade process. Usually, the PicOS Repository takes around 1GB and Recovery Repository requires around 600MB.
Background:
The AS4600-54T is a special case of bare-metal switch; it comes with limited NAND Flash storage since it was an early design. With only 1GB of NAND Flash, the AS4600-54T only has space to install the PicOS Repository, but no space for the Recovery Repository. Even though PicOS can be installed and operated on the AS4600-54T, users will encounter issues when they try to upgrade the system image because of the missing Recovery Repository.
Solutions:
There are two solutions available:
1. Manual upgrade.
2. Using an additional USB repository.
Manual Upgrade
This solution requires users to set up an environment to copy the configuration files and any user data files before installing the new PicOS image through ONIE. Users should follow this procedure:
1. Set up an environment on a remote FTP or TFTP server.
2. Log in to the switch and copy the configuration files under /picos to the remote FTP or TFTP server.
3. Also copy any user data files.
4. Reboot the switch and log in to ONIE.
5. Follow ONIE installation procedures to install the new PicOS image. This will erase all existing data in the PicOS repository. (For details, please refer to page 16 at http://www.pica8.com/wpcontent/uploads/2015/09/picos-system-configuration.pdf. )
6. Please pay attention to the PicOS installer question that asks for deleting the partitions, it will erase all existing data in the partitions. The PicOS installer will stop if your answer is “no,” or if there is no answer for a while. Answer “yes” to continue to install PicOS.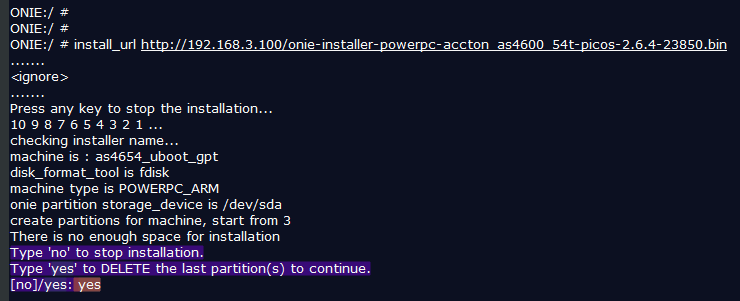
7. Log in to the switch and copy the configuration files and user data from the remote FTP or TFTP server back to /picos. The following configuration files need to be copied and re-installed.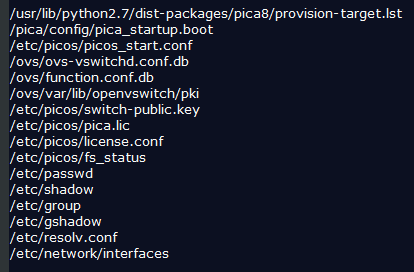
Using an Additional USB Repository
The AS4600-54T has a USB port that can accept most USB sticks as the secondary storage. Users can take the following steps after plugging in a USB stick.
1. Log in to the switch and run ‘blkid’ to identify the current USB stick.
2. If you plug in a USB disk, make sure it is detected as follows: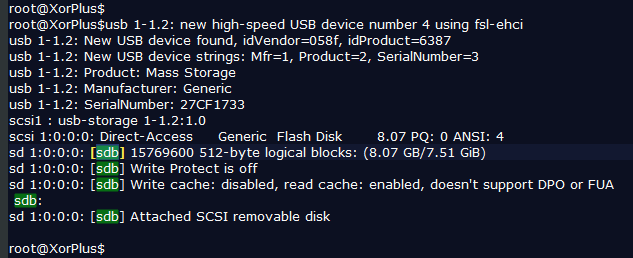
3. If the USB is new, the partition ‘/etc/sdb1/’ needs to be created.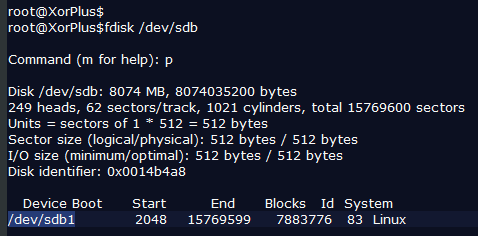
If there is no partition, use fdisk /dev/sdb and then press ‘n’ to add a new partition.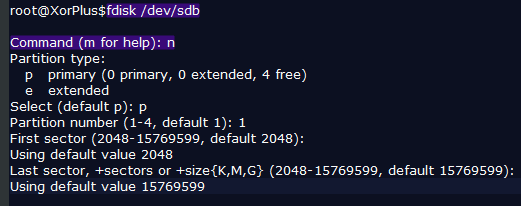
4. Under the Linux prompt, set the label name of the USB stick to PICOS-BAK.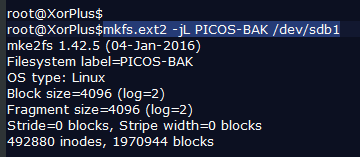
5. Run ‘blkid’ to identify the current SSD again. The label name of the USB stick will change to PICOS-BAK.
6. Now PicOS should be able to recognize the additional disk space. Check the file /etc/picos/fs_status.
Make sure the secondary status is undefined.
7. Reboot the switch and check /etc/picos/fs_status.
At this time, users can follow the typical upgrade schedule to upgrade the system. For more details, please refer to page 20 at: http://www.pica8.com/wp-content/uploads/2015/09/picos-system-configuration.pdf
Notes
Prior to 2.6.4, users need to also change the file /etc/functions_hw to enable the USB upgrade on the AS4600-54T. This procedure can be waived after 2.6.5 where the software is enhanced to handle this limitation.
Prev Page How to check Hardware ID in all datacenter switch platforms which is installed PicaOS