
Purpose:
This post shows the procedures to install Accton-Diag via ONIE on switch.
Model:
AS4610-30T,AS4610-30P
AS4610-52T,AS4610-52P
Method:
A. USB drive
B. Cable transfer
TFTP
FTP
HTTP
Preparation:
A. Personal computer
B. Onie-updater
Download the ONIE-updater image for your own device.
C. Serial Console cable:
A cable which attached in the original box.
D. Console terminal
Putty,Teraterm,SecureCRT,etc...
E. Empty USB drive or transport protocol tools
USB drive
TFTP server
FTP server
Http file server
Procedure:
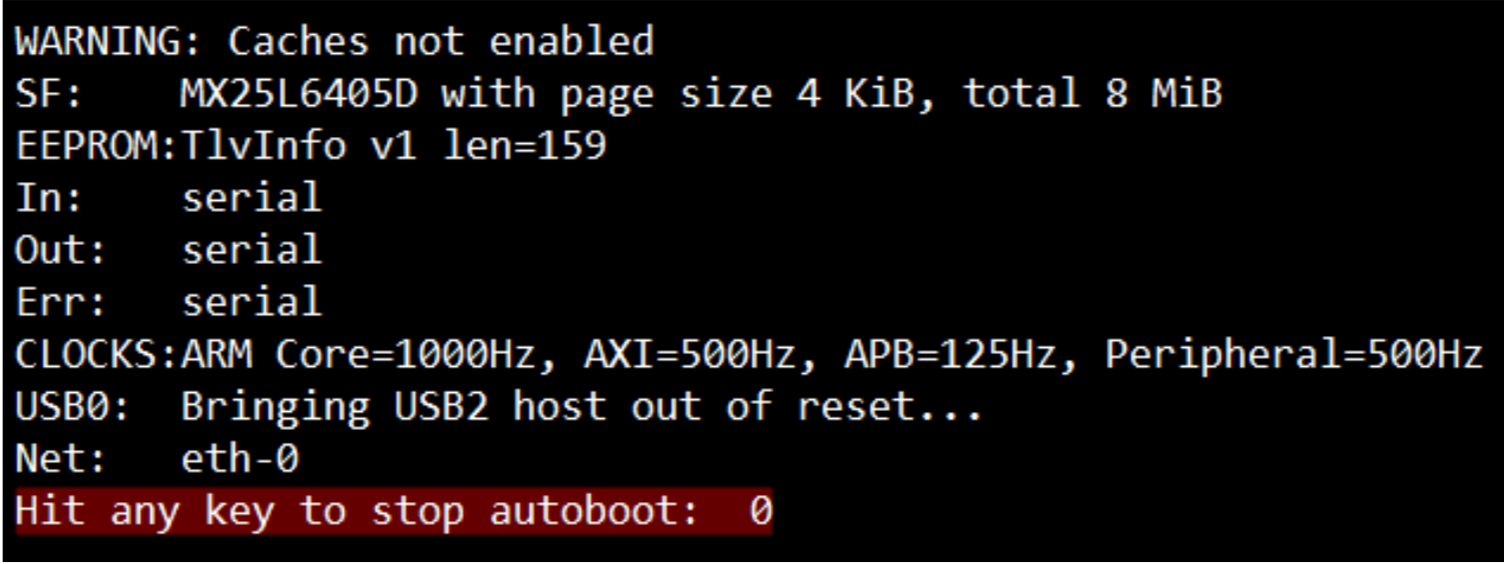
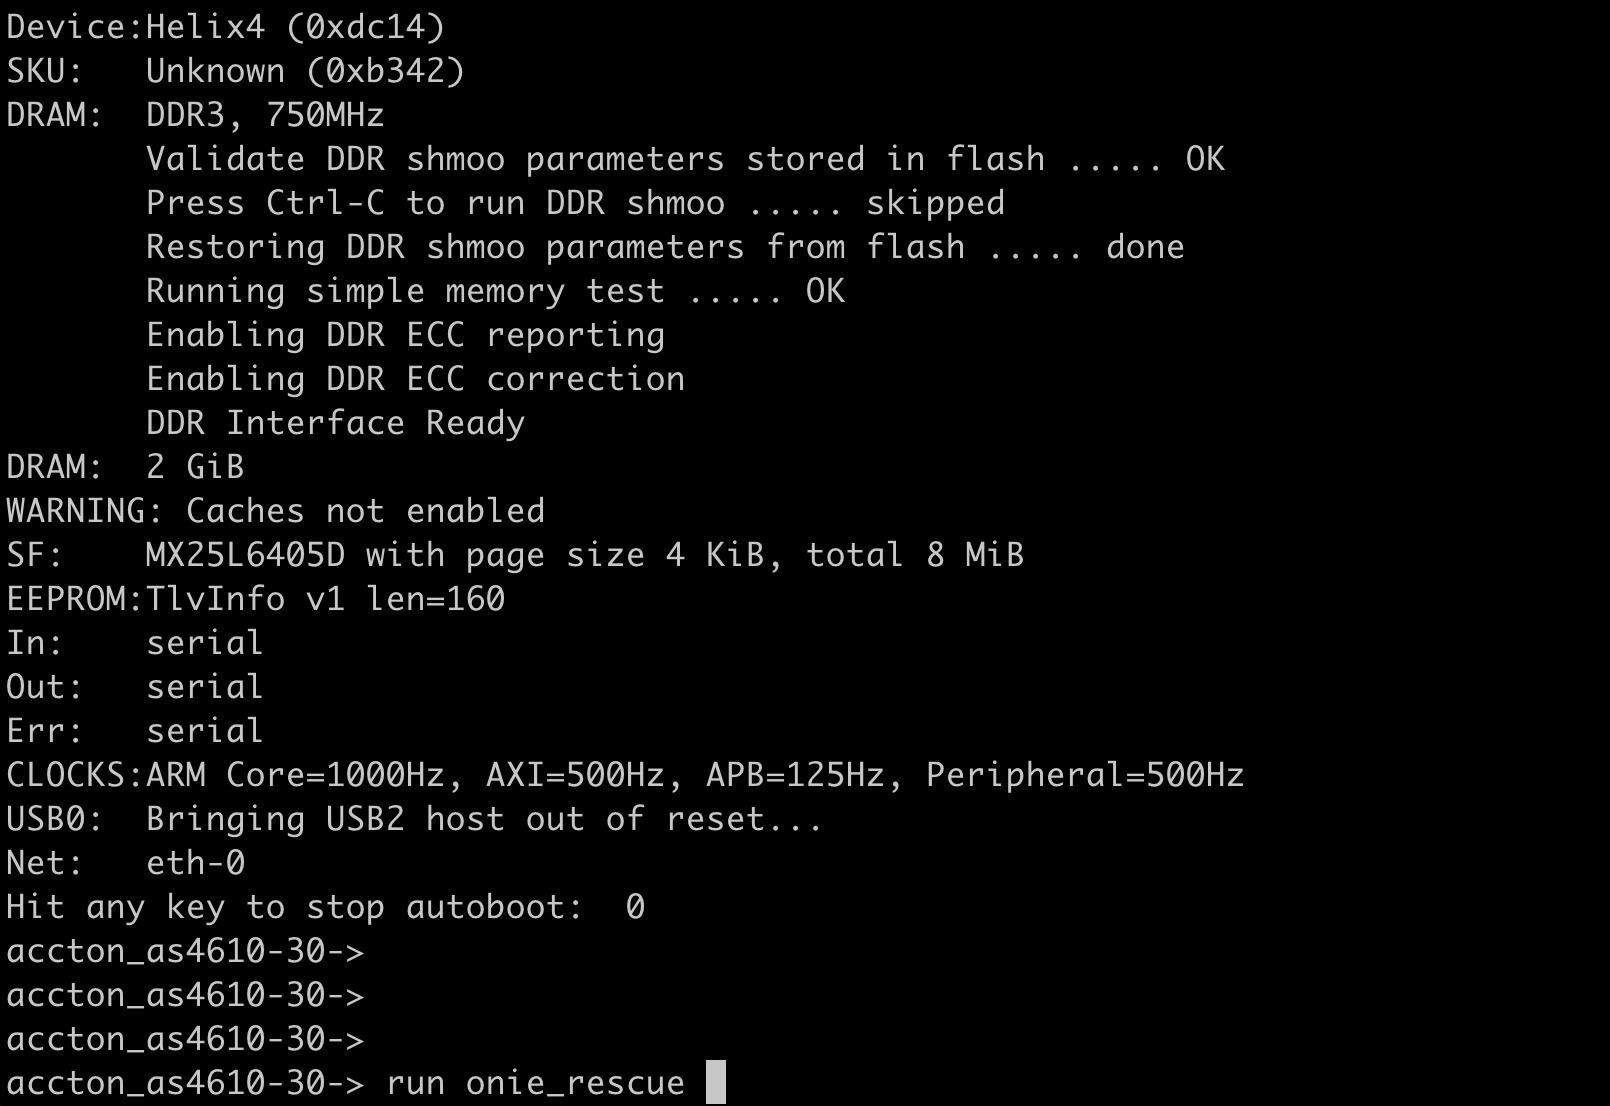
STEP1. Press "any key" to enter the U-Boot mode after booting up the switch.
STEP2. Execute "accton_as4610-30-> run onie_rescue".
accton_as4610-30-> run onie_rescue
STEP3. Start the upgrade process (5 examples)
USB drive
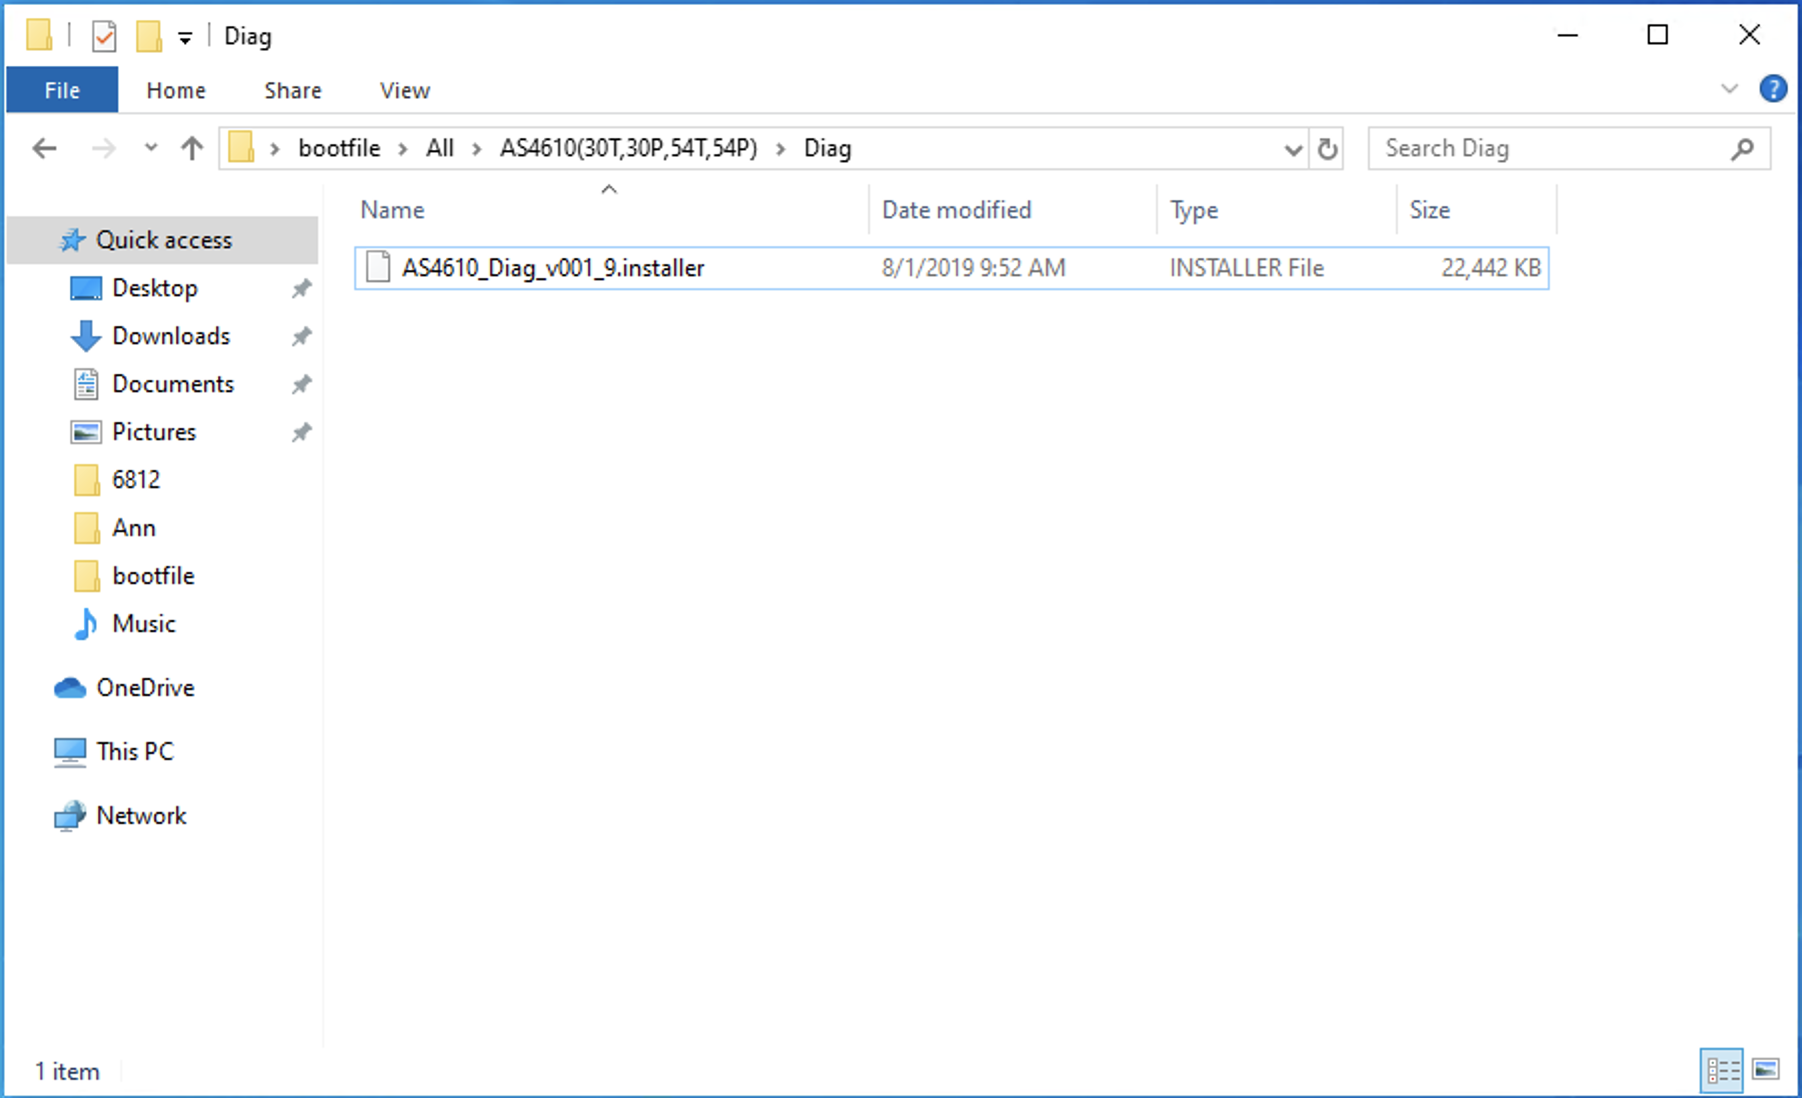
1. Put the onie_diag_installer to the USB drive.(e.g., AS4610_Diag_v001_9.installer)
2. Insert the USB drive into the data center front panel.

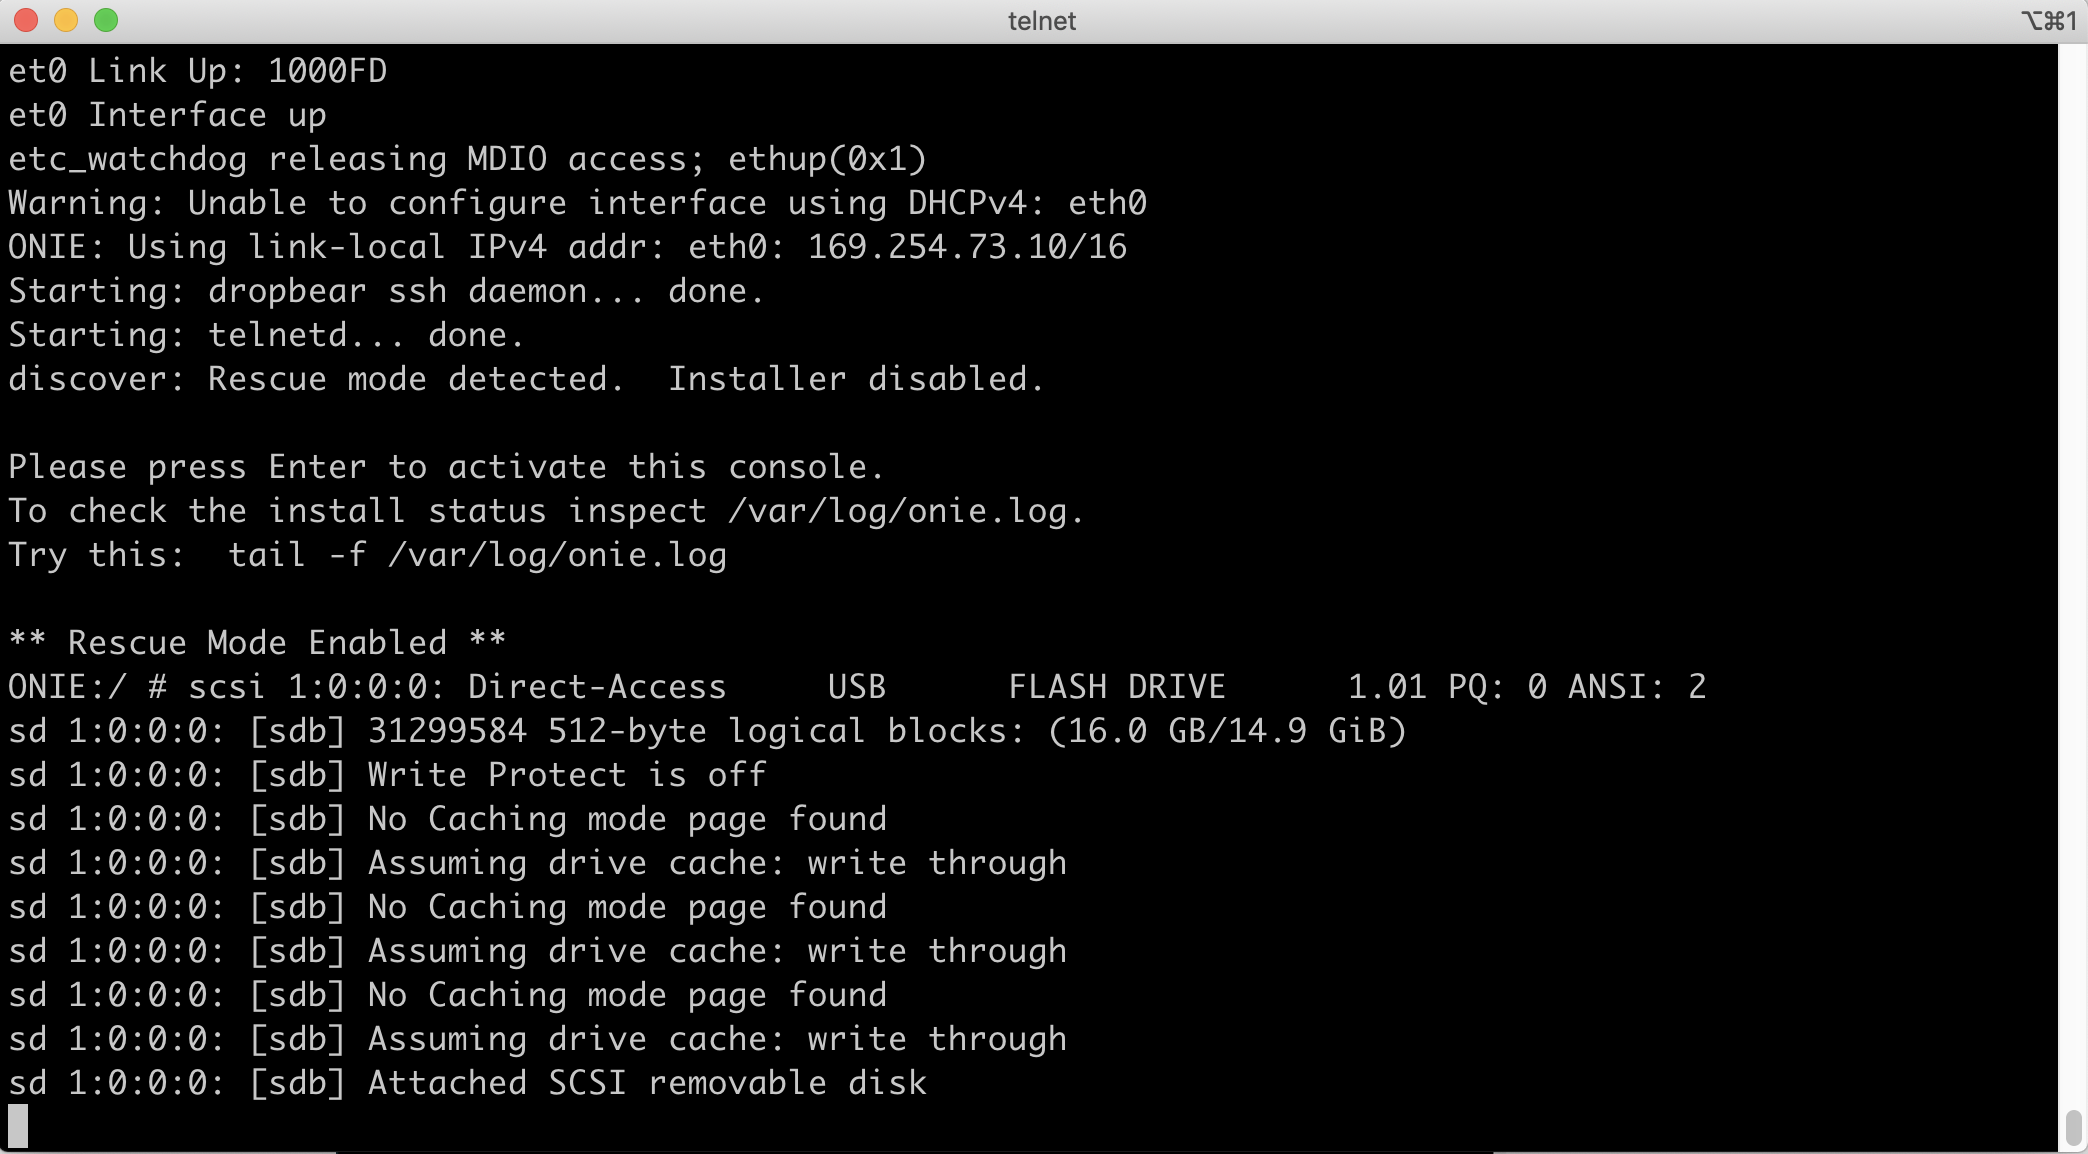
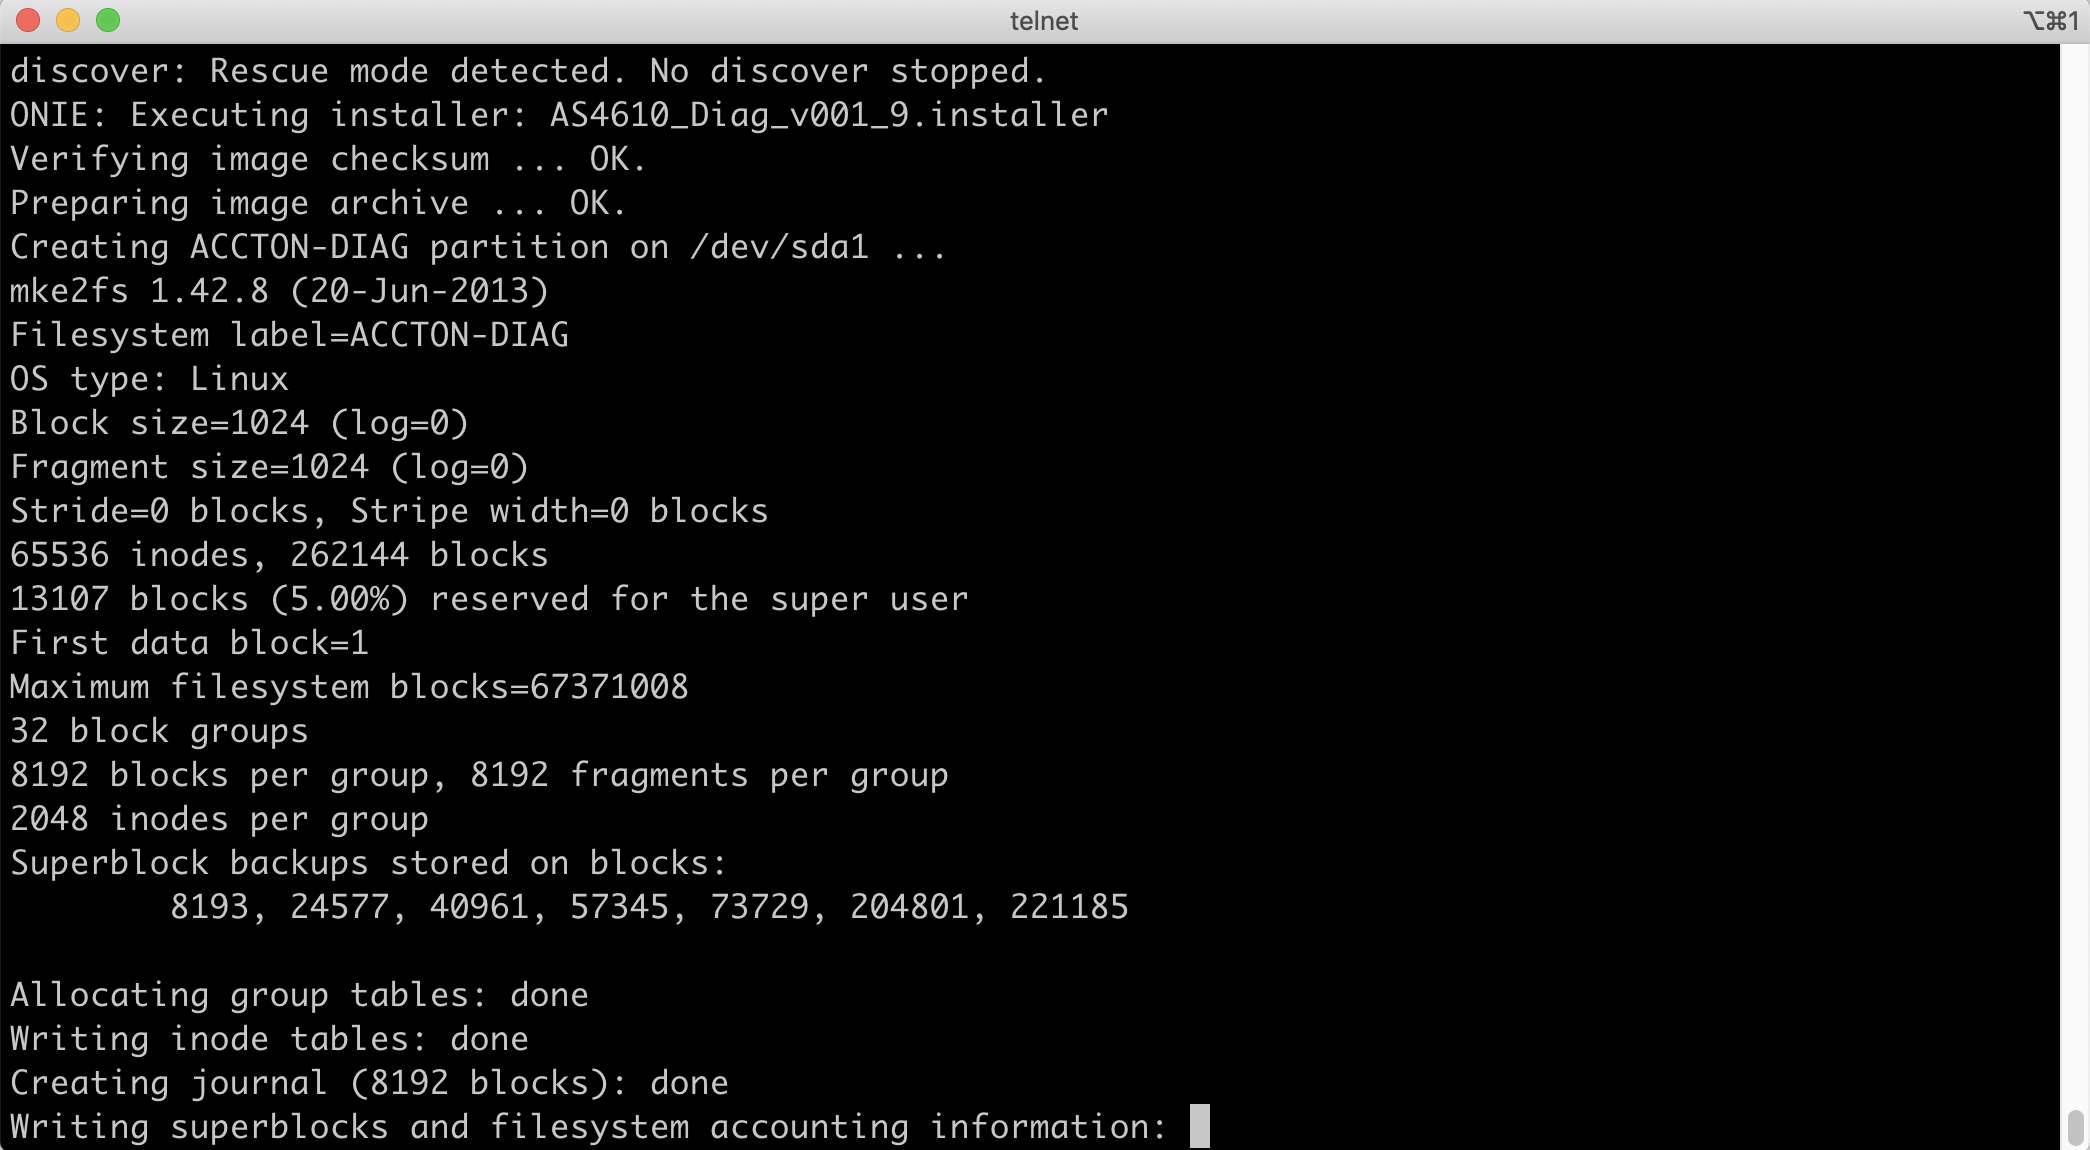
3. The terminal will show the following message.
4. Input "gdisk /dev/sdb -l" command to show the storage status (e.g., /dev/sdb)
ONIE:/ #
GPT fdisk (gdisk) version 0.8.8

Partition table scan:
MBR: MBR only
BSD: not present
APM: not present
GPT: not present


***************************************************************
Found invalid GPT and valid MBR; converting MBR to GPT format
in memory.
***************************************************************


Warning! Secondary partition table overlaps the last partition by
33 blocks!
You will need to delete this partition or resize it in another utility.
Disk /dev/sdb: 31299584 sectors, 14.9 GiB
Logical sector size: 512 bytes
Disk identifier (GUID): DDBB4463-8E78-41D1-BD4C-0BF3897007EF
Partition table holds up to 128 entries
First usable sector is 34, last usable sector is 31299550
Partitions will be aligned on 2048-sector boundaries
Total free space is 2014 sectors (1007.0 KiB)

Number Start (sector) End (sector) Size Code Name
1 2048 31299583 14.9 GiB 0700 Microsoft basic data

Note: /dev/sda is original hard drive.
5. Mount the USB drive and check the mount status.
ONIE:/mnt #
ONIE:/mnt #
ONIE:/mnt #
/dev/sdb1 on /mnt/usb type vfat (rw,relatime,fmask=0022,dmask=0022,codepage=cp437,iocharset=iso8859-1,shortname=mixed,errors=remount-ro)
6. Copy the onie_diag_installer to local storage. (e.g., /tmp)
 ONIE:/mnt/usb #
 AS4610_Diag_v001_9.installer
 ONIE:/mnt/usb #
7. Install the Diag by "onie-nos-installl [onie_diag_installer]" command.
ONIE:/ #
ONIE:/tmp #

ONIE:/tmp #
8. Diag will be installed immediately. After installing, the system will automatically reboot.
TFTP
1. Please connect to the TFTP server with Mgmt port. (e.g., AS4610-30T)
Note: Please use 1G port.

2. Set the IP address in ONIE and try to ping the TFTP server. (Server IP:188.188.99.1)
ONIE:/ #
ONIE:/ # ifconfig
eth0 Link encap:Ethernet HWaddr 3C:2C:99:41:46:60
inet addr:188.188.184.123 Bcast:188.188.255.255 Mask:255.255.0.0
inet6 addr: fe80::3e2c:99ff:fe41:4660/64 Scope:Link
UP BROADCAST RUNNING MULTICAST MTU:1500 Metric:1
RX packets:1705591 errors:0 dropped:3640 overruns:0 frame:0
TX packets:19296 errors:0 dropped:0 overruns:0 carrier:0
collisions:0 txqueuelen:1000
RX bytes:264260788 (252.0 MiB) TX bytes:2372380 (2.2 MiB)
Interrupt:234 Base address:0x2000

ONIE:/ #
PING 188.188.1.1 (188.188.1.1): 56 data bytes
64 bytes from 188.188.1.1: seq=0 ttl=64 time=0.656 ms
64 bytes from 188.188.1.1: seq=1 ttl=64 time=0.279 ms
64 bytes from 188.188.1.1: seq=2 ttl=64 time=0.323 ms
64 bytes from 188.188.1.1: seq=3 ttl=64 time=0.332 ms
^C
--- 188.188.1.1 ping statistics ---
4 packets transmitted, 4 packets received, 0% packet loss
round-trip min/avg/max = 0.279/0.370/0.656 ms
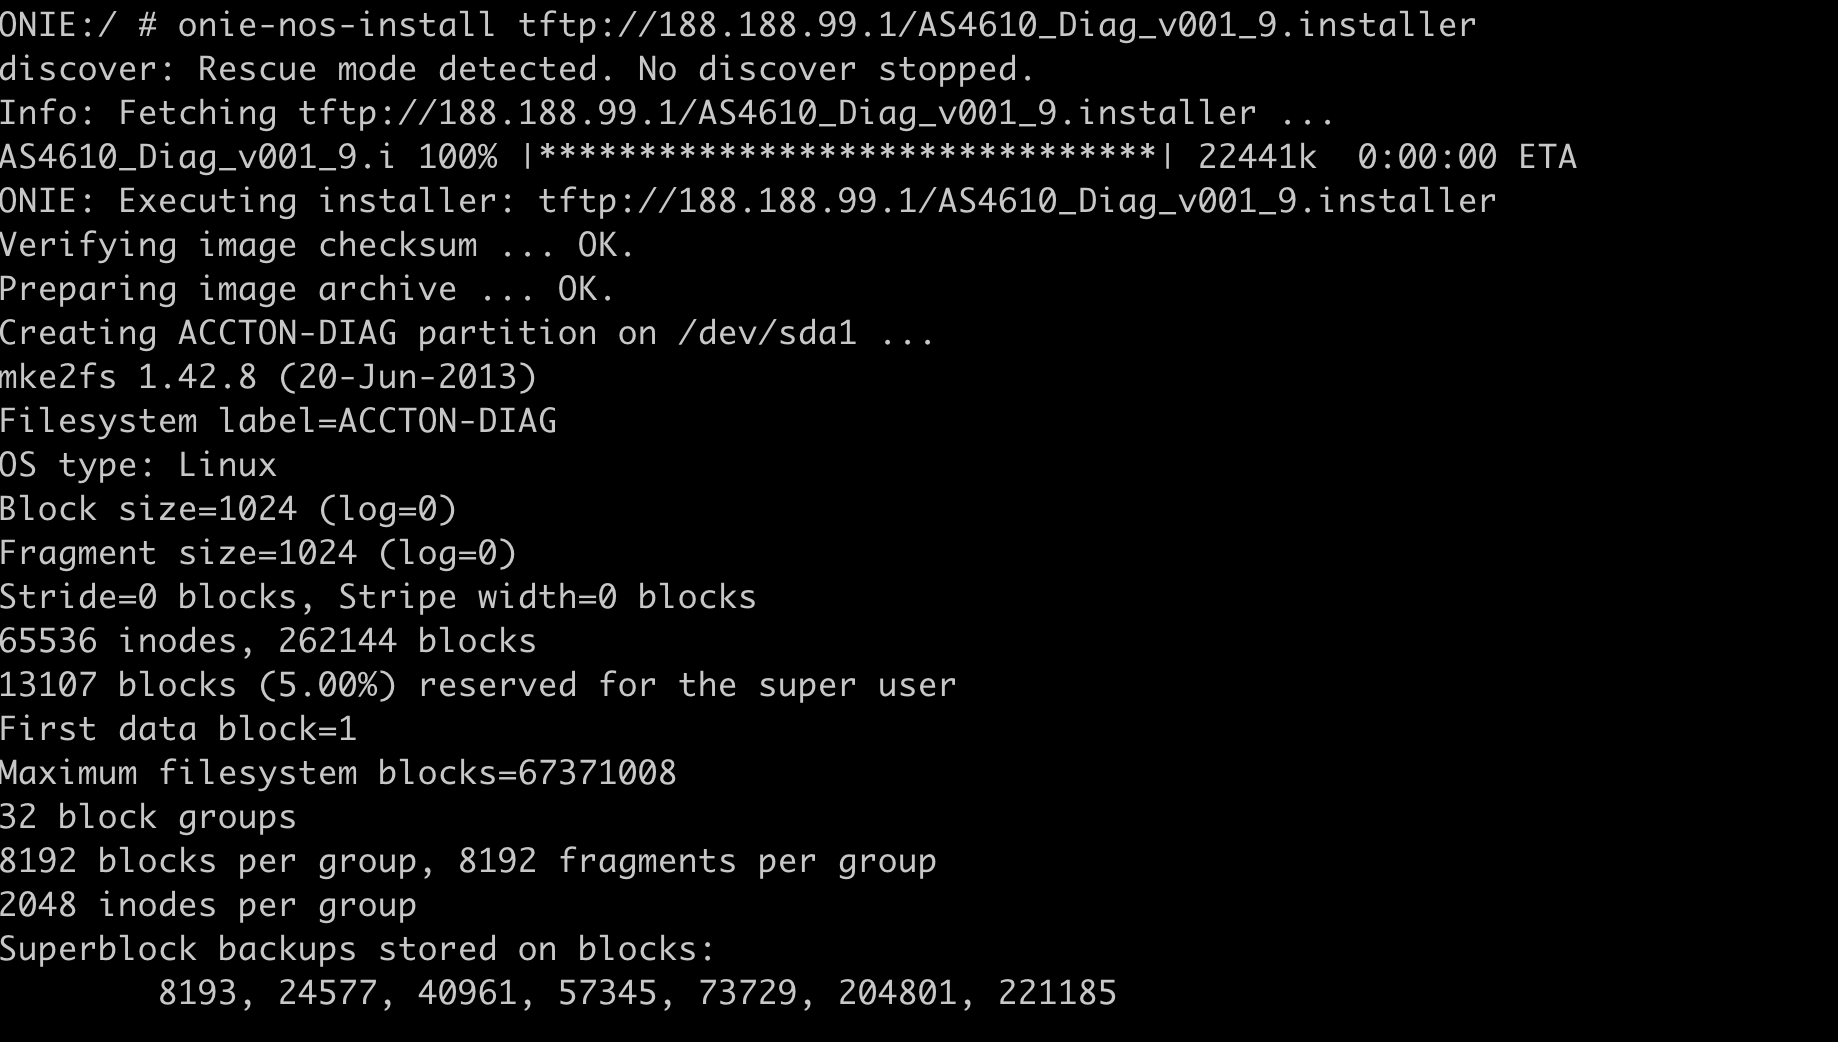
3. Input "onie-nos-install [TFTP location]" command and the installation will start.
ONIE:/ #
FTP
1. Please connect to the FTP server with Mgmt port. (e.g., AS4610-30T)
Note: Please use 1G port.
2. Set the IP address in ONIE and try to ping the FTP server. (Server IP: 188.188.184.1)
ONIE:/ #
ONIE:/ #
eth0 Link encap:Ethernet HWaddr 3C:2C:99:41:46:60
inet addr:188.188.184.123 Bcast:188.188.255.255 Mask:255.255.0.0
inet6 addr: fe80::3e2c:99ff:fe41:4660/64 Scope:Link
UP BROADCAST RUNNING MULTICAST MTU:1500 Metric:1
RX packets:5587000 errors:0 dropped:8511 overruns:0 frame:0
TX packets:4441 errors:0 dropped:0 overruns:0 carrier:0
collisions:0 txqueuelen:1000
RX bytes:741003969 (706.6 MiB) TX bytes:436150 (425.9 KiB)
Interrupt:234 Base address:0x2000

ONIE:/ #
PING 188.188.184.1 (188.188.184.1): 56 data bytes
64 bytes from 188.188.184.1: seq=0 ttl=128 time=0.505 ms
64 bytes from 188.188.184.1: seq=1 ttl=128 time=0.284 ms
64 bytes from 188.188.184.1: seq=2 ttl=128 time=0.314 ms
^C
--- 188.188.184.1 ping statistics ---
3 packets transmitted, 3 packets received, 0% packet loss
round-trip min/avg/max = 0.284/0.367/0.505 ms
3. Input "onie-nos-install [FTP account:password@location]" command and the installation will start.
ONIE:/ # onie-nos-install ftp://ts:support@188.188.184.1/AS4610_Diag_v001_9.installer

HTTP
1. Please connect to the HTTP server with Mgmt port.(e.g., AS4610-30T)
Note: Please use 1G port.
2. Set the IP address in ONIE and try to ping the HTTP server. (Server IP: 188.188.99.1)
ONIE:/ # ifconfig eth0 188.188.184.123 netmask 255.255.0.0
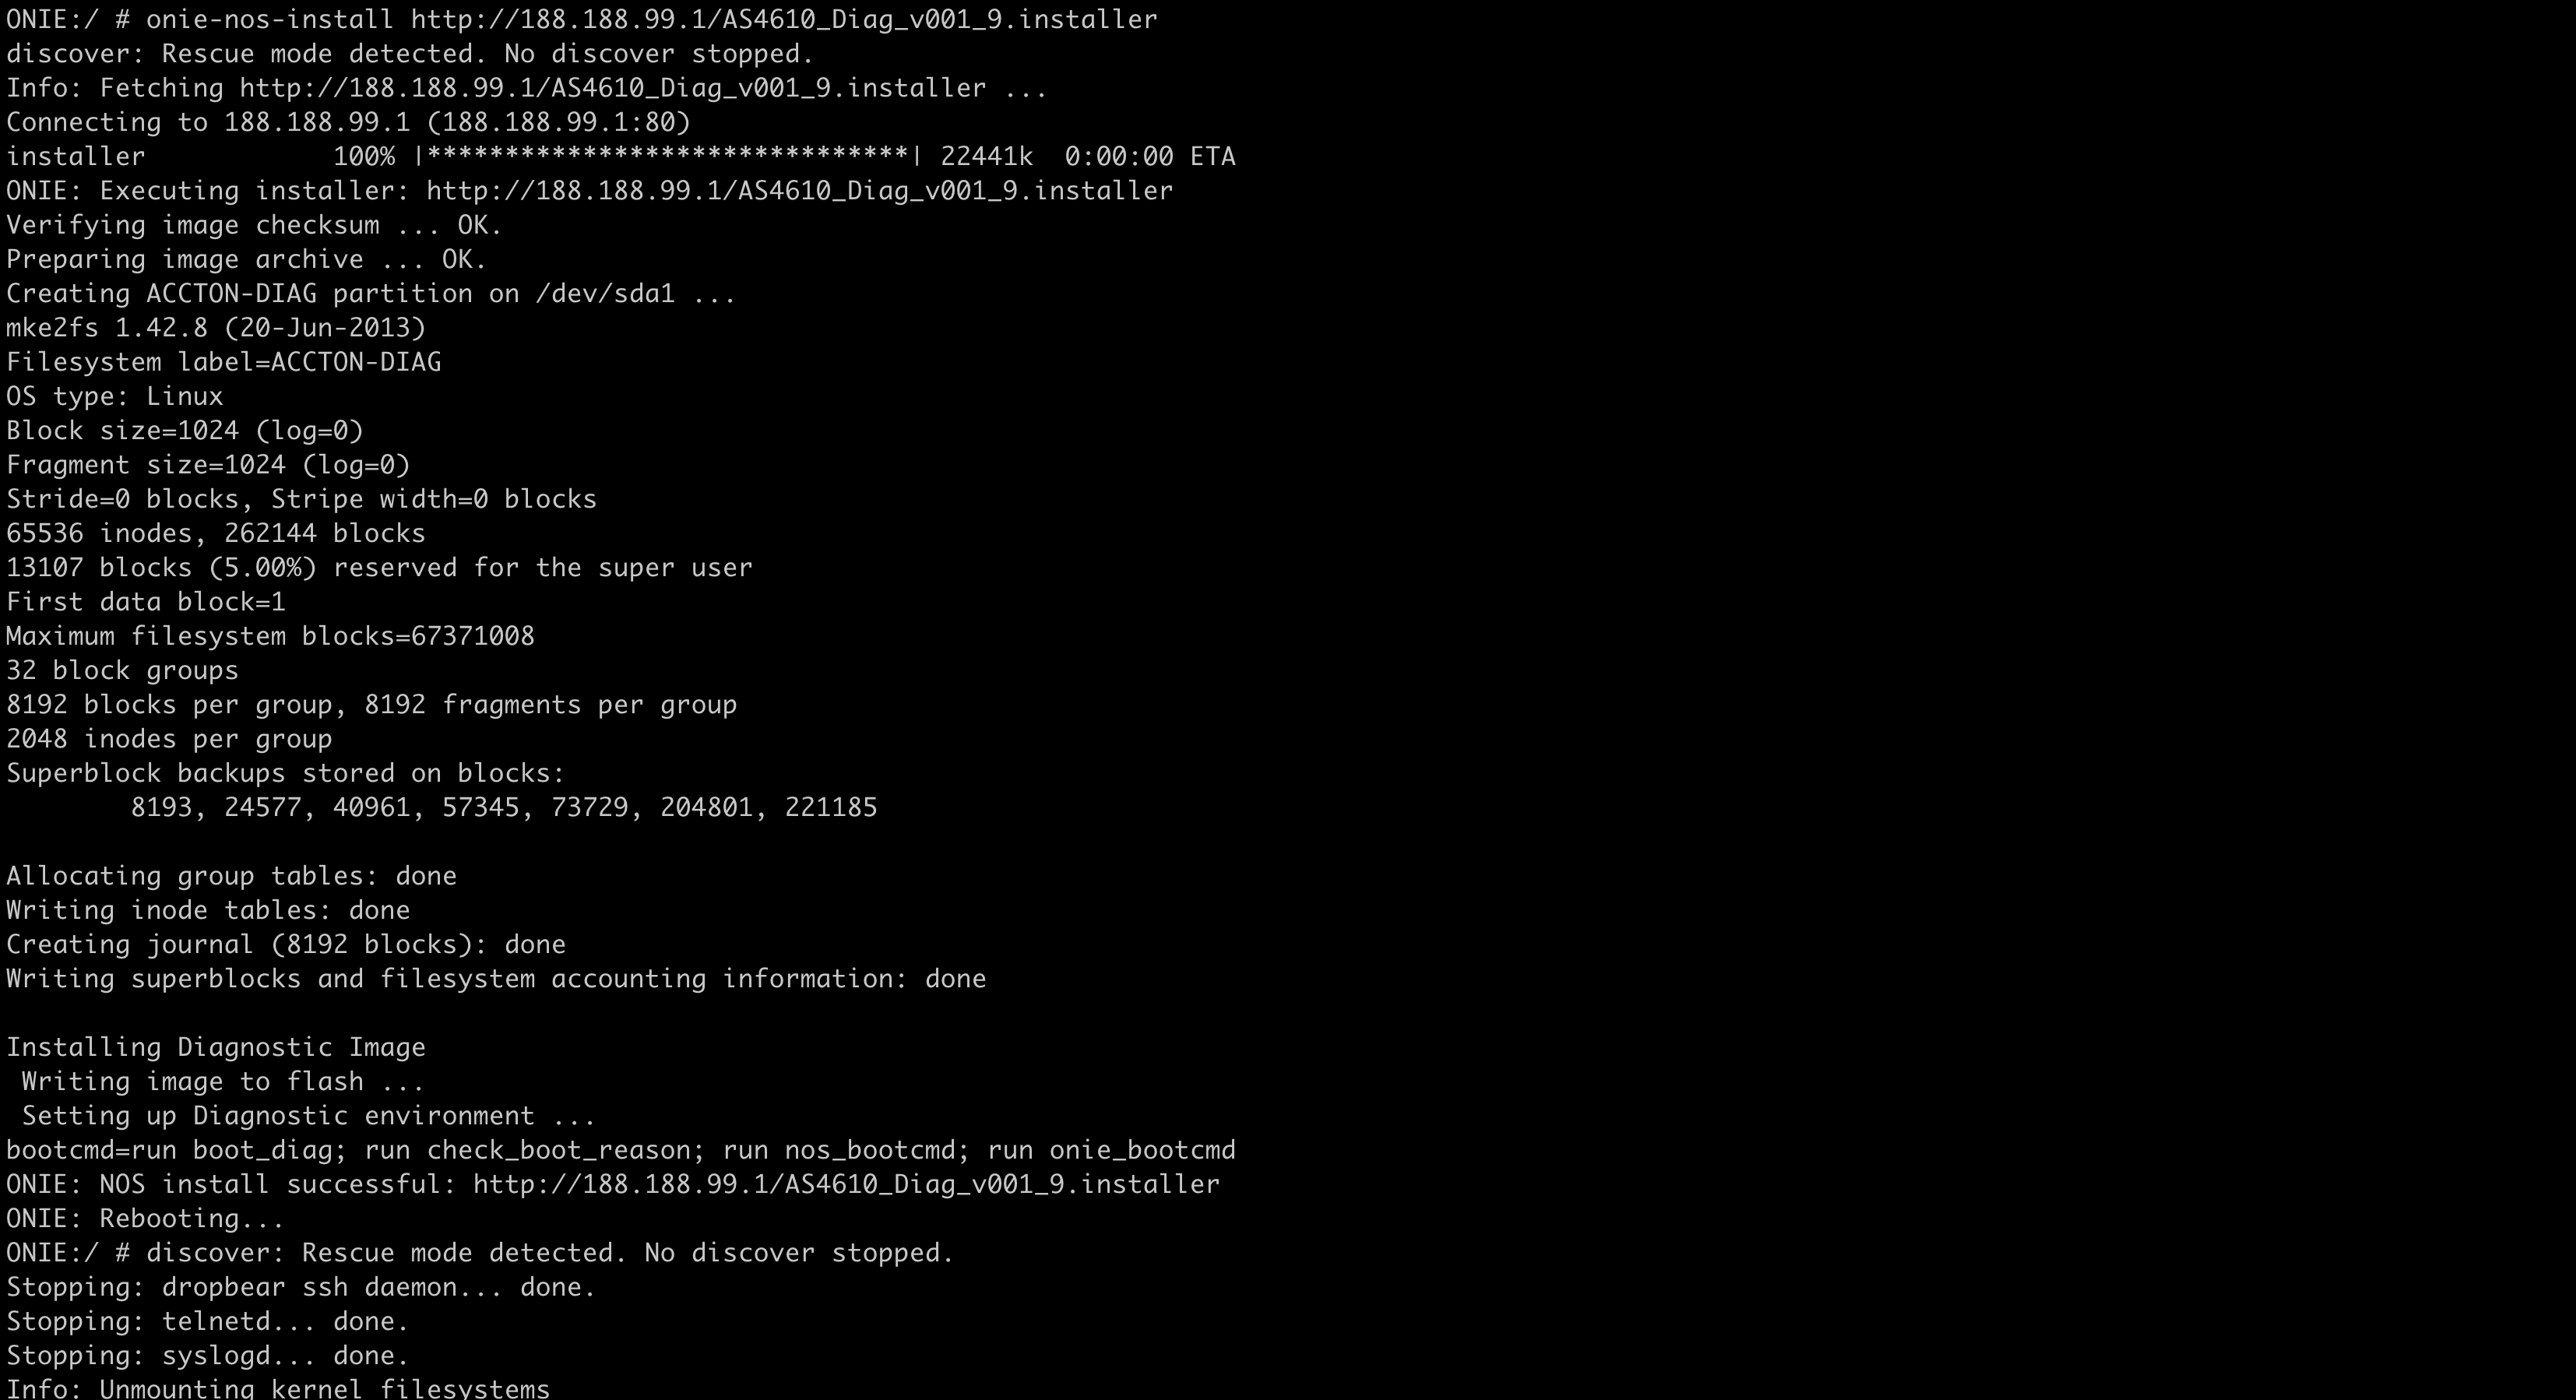
3. Input "onie-nos-install [HTTP URL]" command and the installation will start.
ONIE:/ # onie-nos-install http://188.188.99.1/AS4610_Diag_v001_9.installer
STEP4. After rebooting, press "any key" to enter the U-Boot mode again and execute "run diag_bootcmd", then you can use the Accton-Diag now.
accton_as4610-30-> run diag_bootcmd
Prev Page [ACCTON Diag.] How to test hardware function in the power pc platform
Next Page [BMC] How to update the Accton-BMC via web interface?