
Purpose:
This post shows the procedures to install Accton-Diag via ONIE on switch.
Model:
AS5712-54X
AS5812-54X, AS5812-54T
AS5912-54X
AS5916-54XKS, AS5916-54XL
AS6712-32X
AS6812-32X
AS7712-32X
Method:
A. USB drive
B. Cable transfer
TFTP
FTP
HTTP
SCP
Preparation:
A. Personal computer
B. Onie-updater
Download the ONIE-updater image for your own device.
C. Serial Console cable:
A cable which attached in the original box.
D. Console terminal
Putty,Teraterm,SecureCRT,etc...
E. Empty USB drive or transport protocol tools
USB drive
TFTP server
FTP server
Http file server
OpenSSH
Procedure:
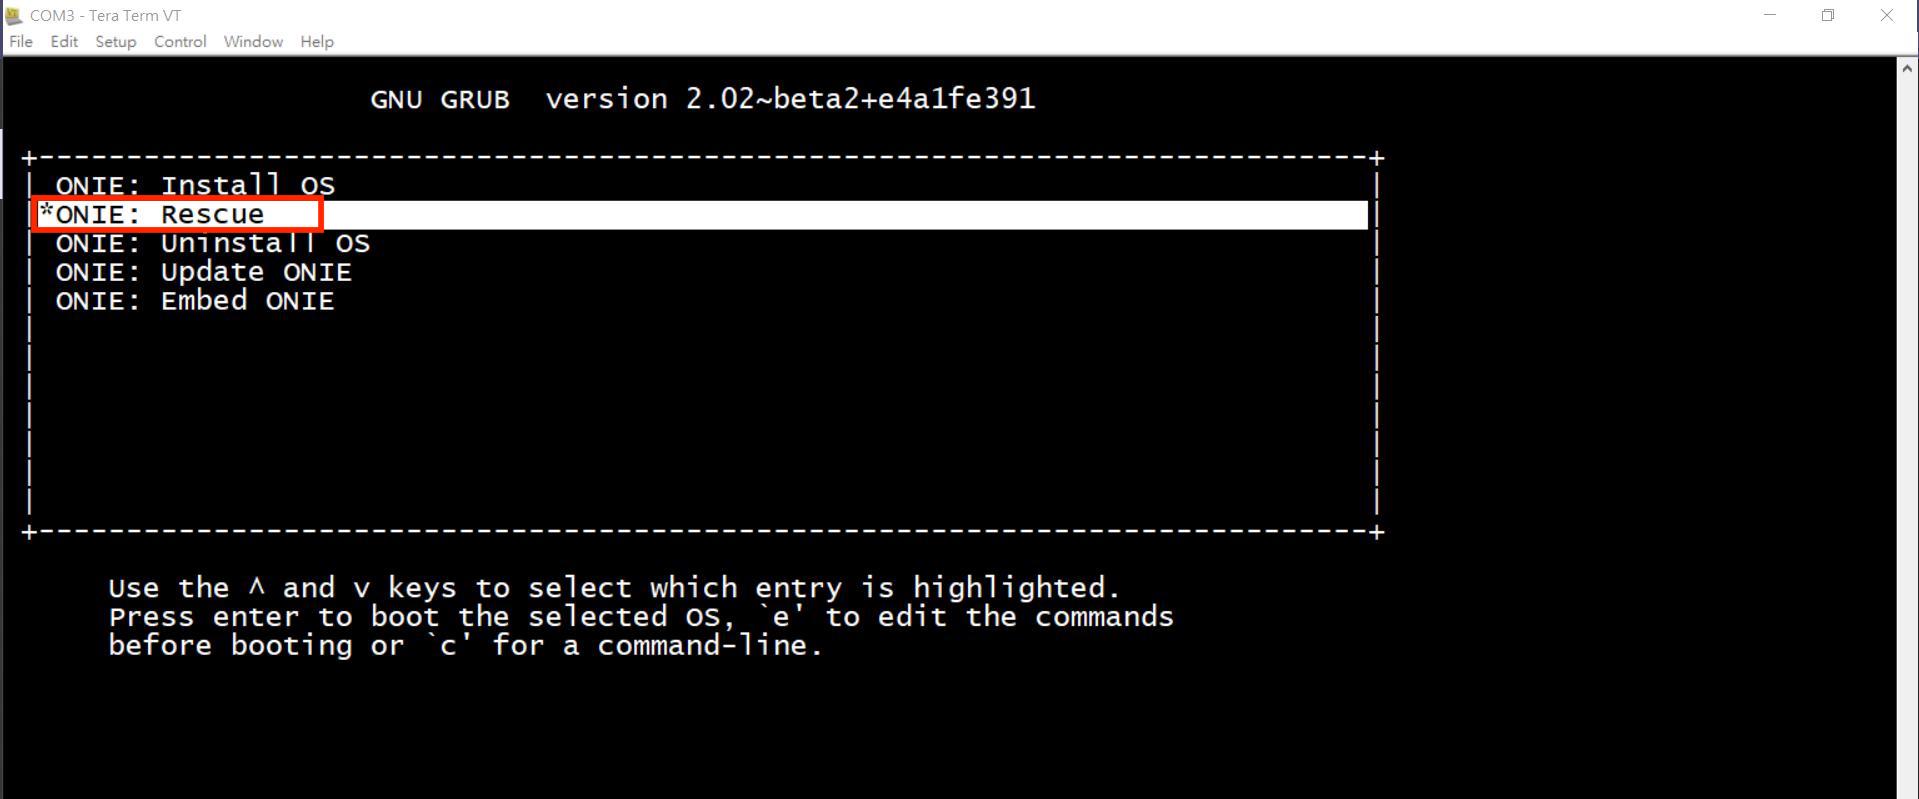
STEP1. Reboot the data center and enter the "ONIE: Rescue" mode.
STEP2. Start the upgrade process (5 examples)
USB drive
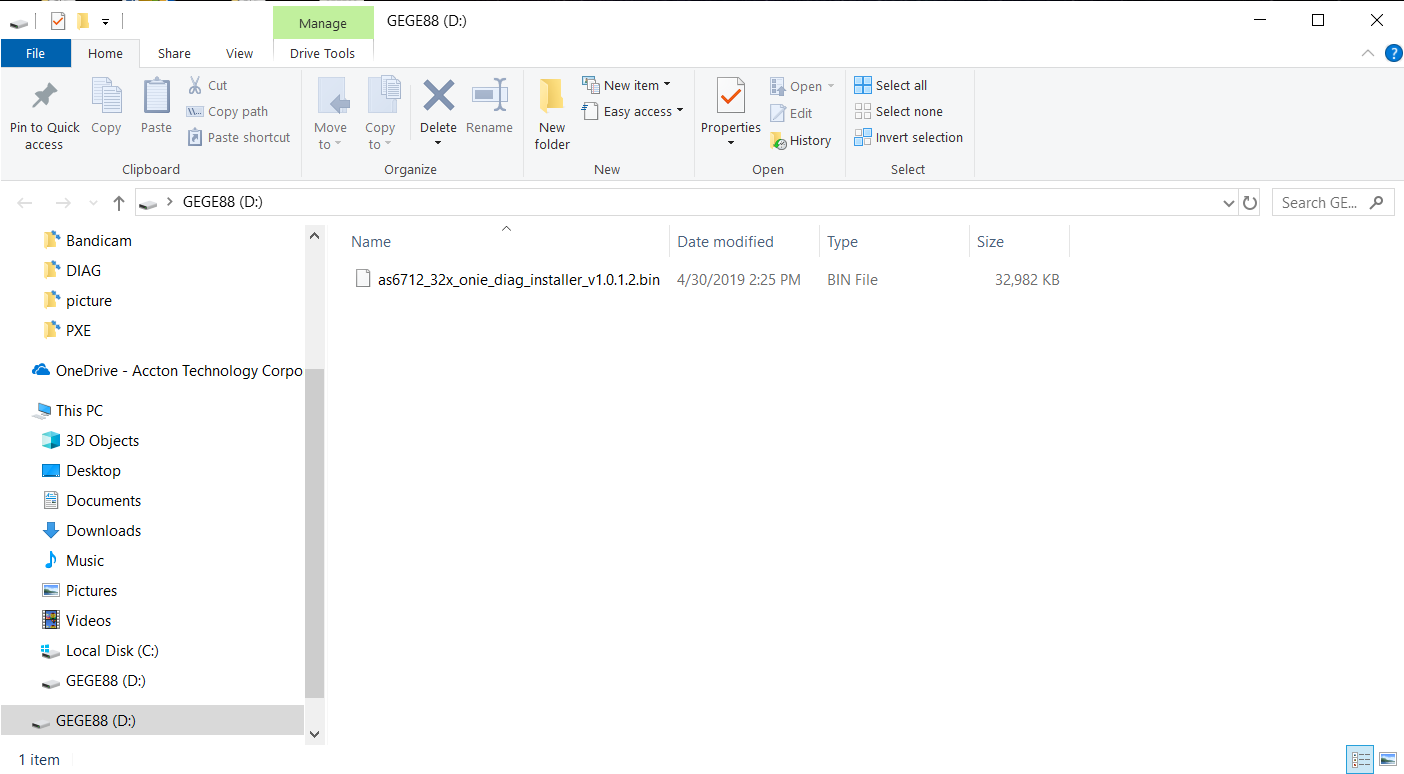
1. Put the onie_diag_installer to the USB drive. (e.g., as6712_32x_onie_diag_installer_v1.0.1.2.bin )
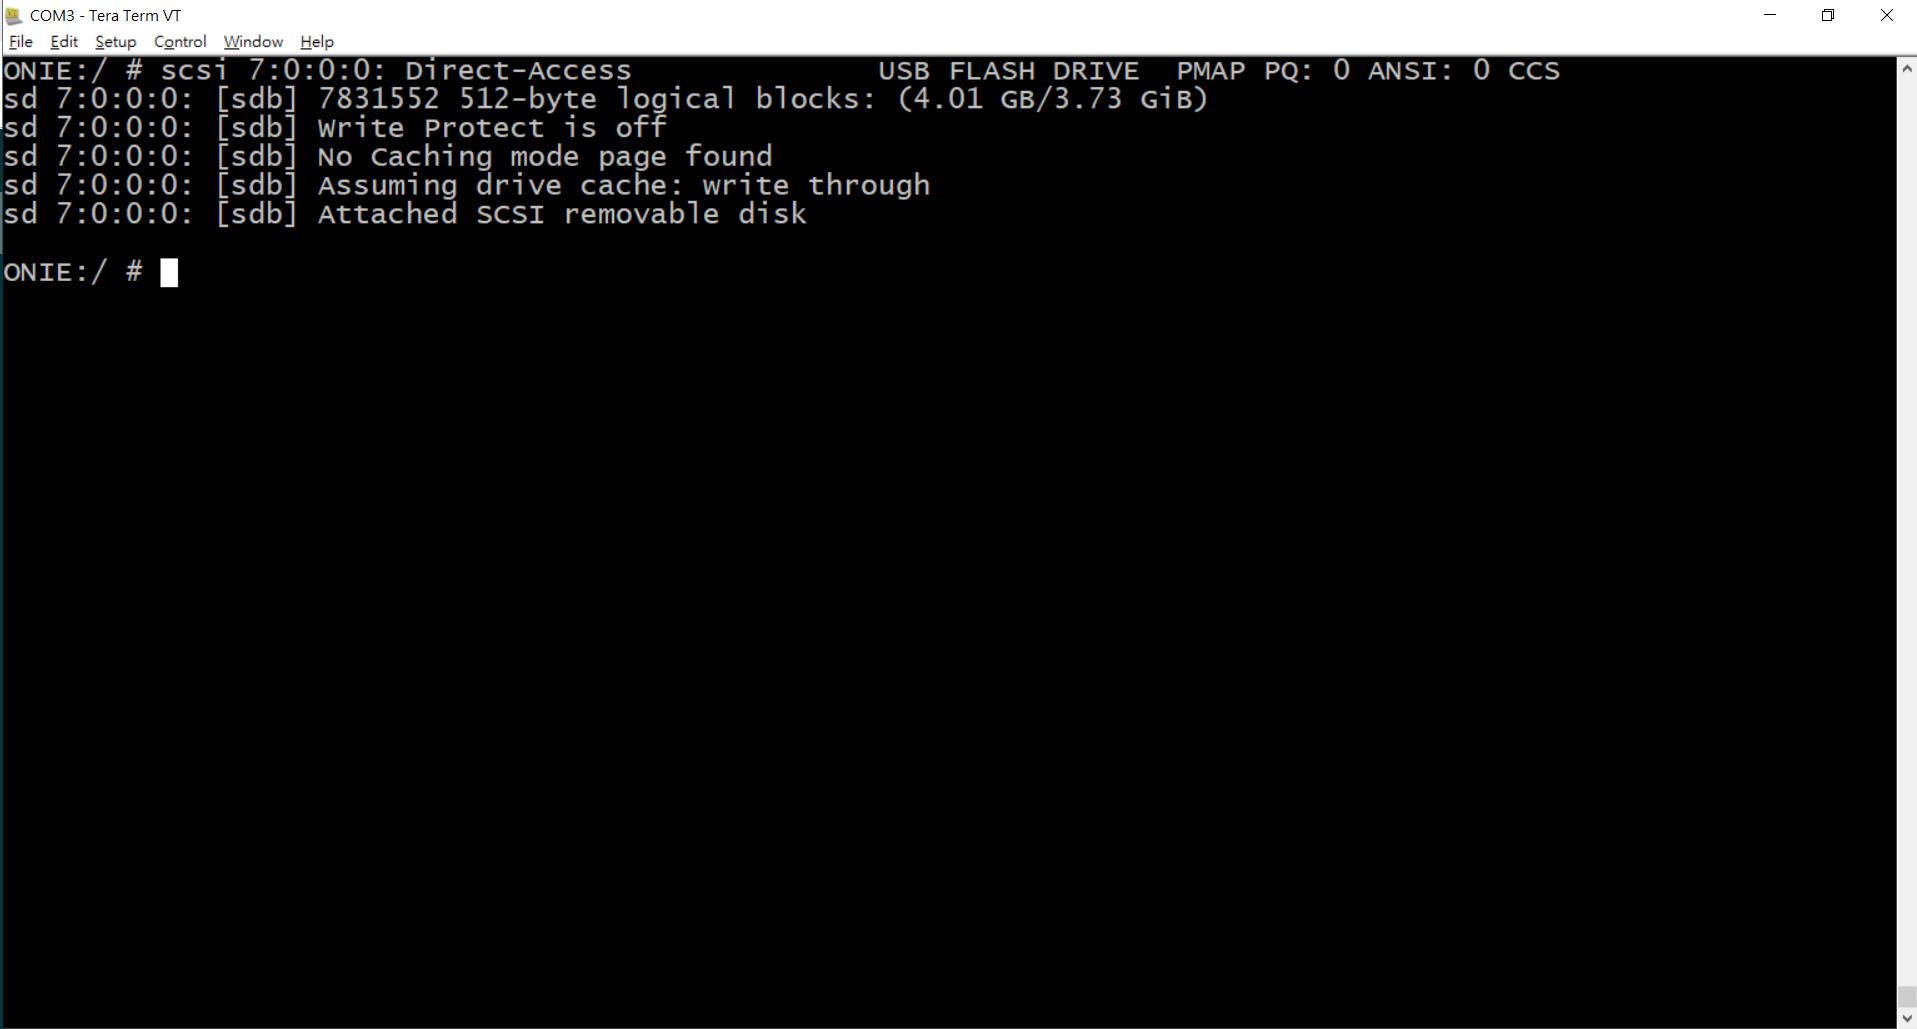
2. Insert the USB drive into the data center front panel.

3. The terminal will show the following message.
4. Input "fdisk -l" command to show the storage status (e.g., /dev/sdb)
       ONIE:/ # fdisk -l

       Disk /dev/sda: 8048 MB, 8048869376 bytes
       255 heads, 63 sectors/track, 978 cylinders
       Units = cylinders of 16065 * 512 = 8225280 bytes

       Device Boot Start End Blocks Id System
       /dev/sda1 * 1 979 7860223+ ee EFI GPT
       Partition 1 has different physical/logical beginnings (non-Linux?):
       phys=(0, 0, 1) logical=(0, 0, 2)
       Partition 1 has different physical/logical endings:
       phys=(1023, 254, 63) logical=(978, 140, 58)


       Device Boot Start End Blocks Id System
       /dev/sdb1 * 1 488 3911744 b Win95 FAT32
       Partition 1 has different physical/logical beginnings (non-Linux?):
       phys=(1023, 254, 63) logical=(0, 128, 1)
       Partition 1 has different physical/logical endings:
       phys=(1023, 254, 63) logical=(487, 125, 22)
Note: /dev/sda is original hard drive, eUSB, 8G
5. Mount the USB drive and check the mount status.
       ONIE:/mnt #
       ONIE:/mnt #
       ONIE:/mnt #
       /dev/sdb1 on /mnt/usb type vfat (rw,relatime,fmask=0022,dmask=0022,codepage=437,iocharset=iso8859-1,shortname=mixed,errors=remount-ro)
6. Copy the onie_diag_installer to local storage. (e.g., /tmp)
        ONIE:/mnt/usb #
        System Volume Information
        as6712_32x_onie_diag_installer_v1.0.1.2.bin
        ONIE:/mnt/usb #
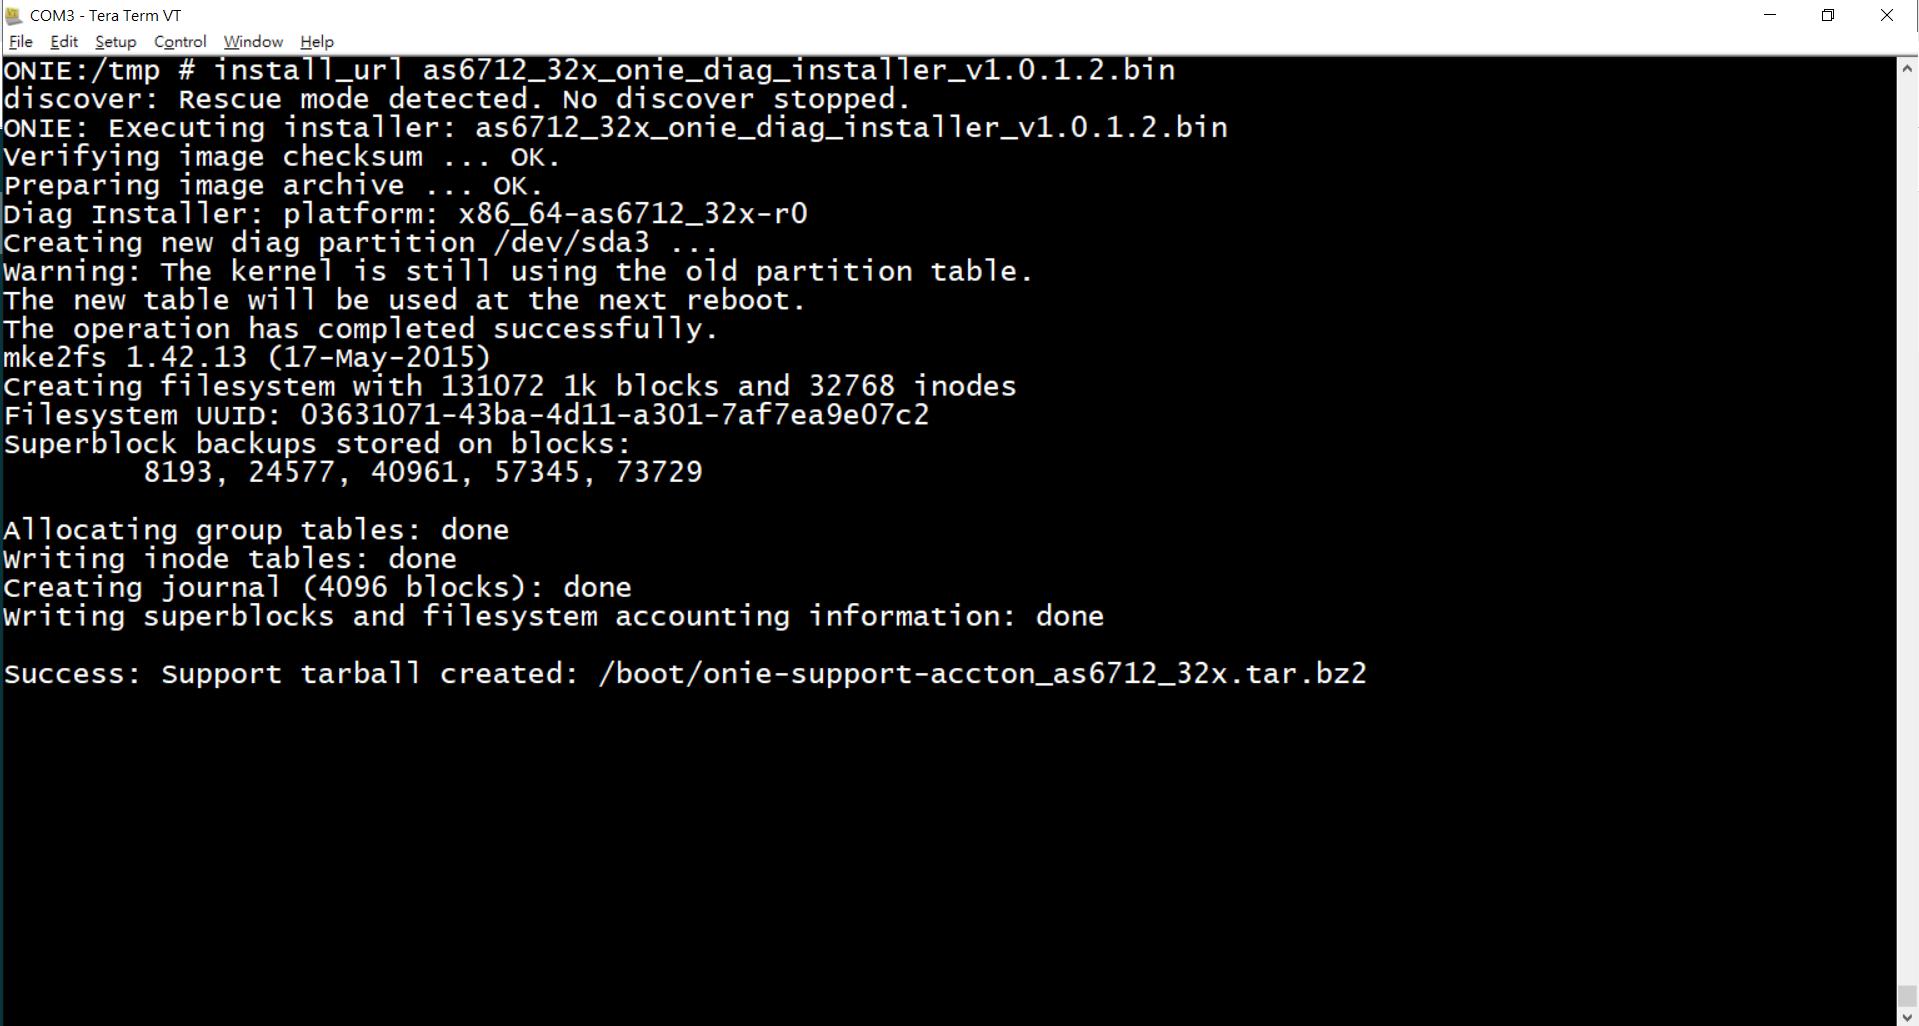
7. Install the Diag by "install_url [onie_diag_installer]" command.
       ONIE:/ #
       ONIE:/tmp #
       as6712_32x_onie_diag_installer_v1.0.1.2.bin
       ONIE:/tmp #
8. Diag will be installed immediately. After installing, the system will automatically reboot.
9. After rebooting, Accton diag can be selected.
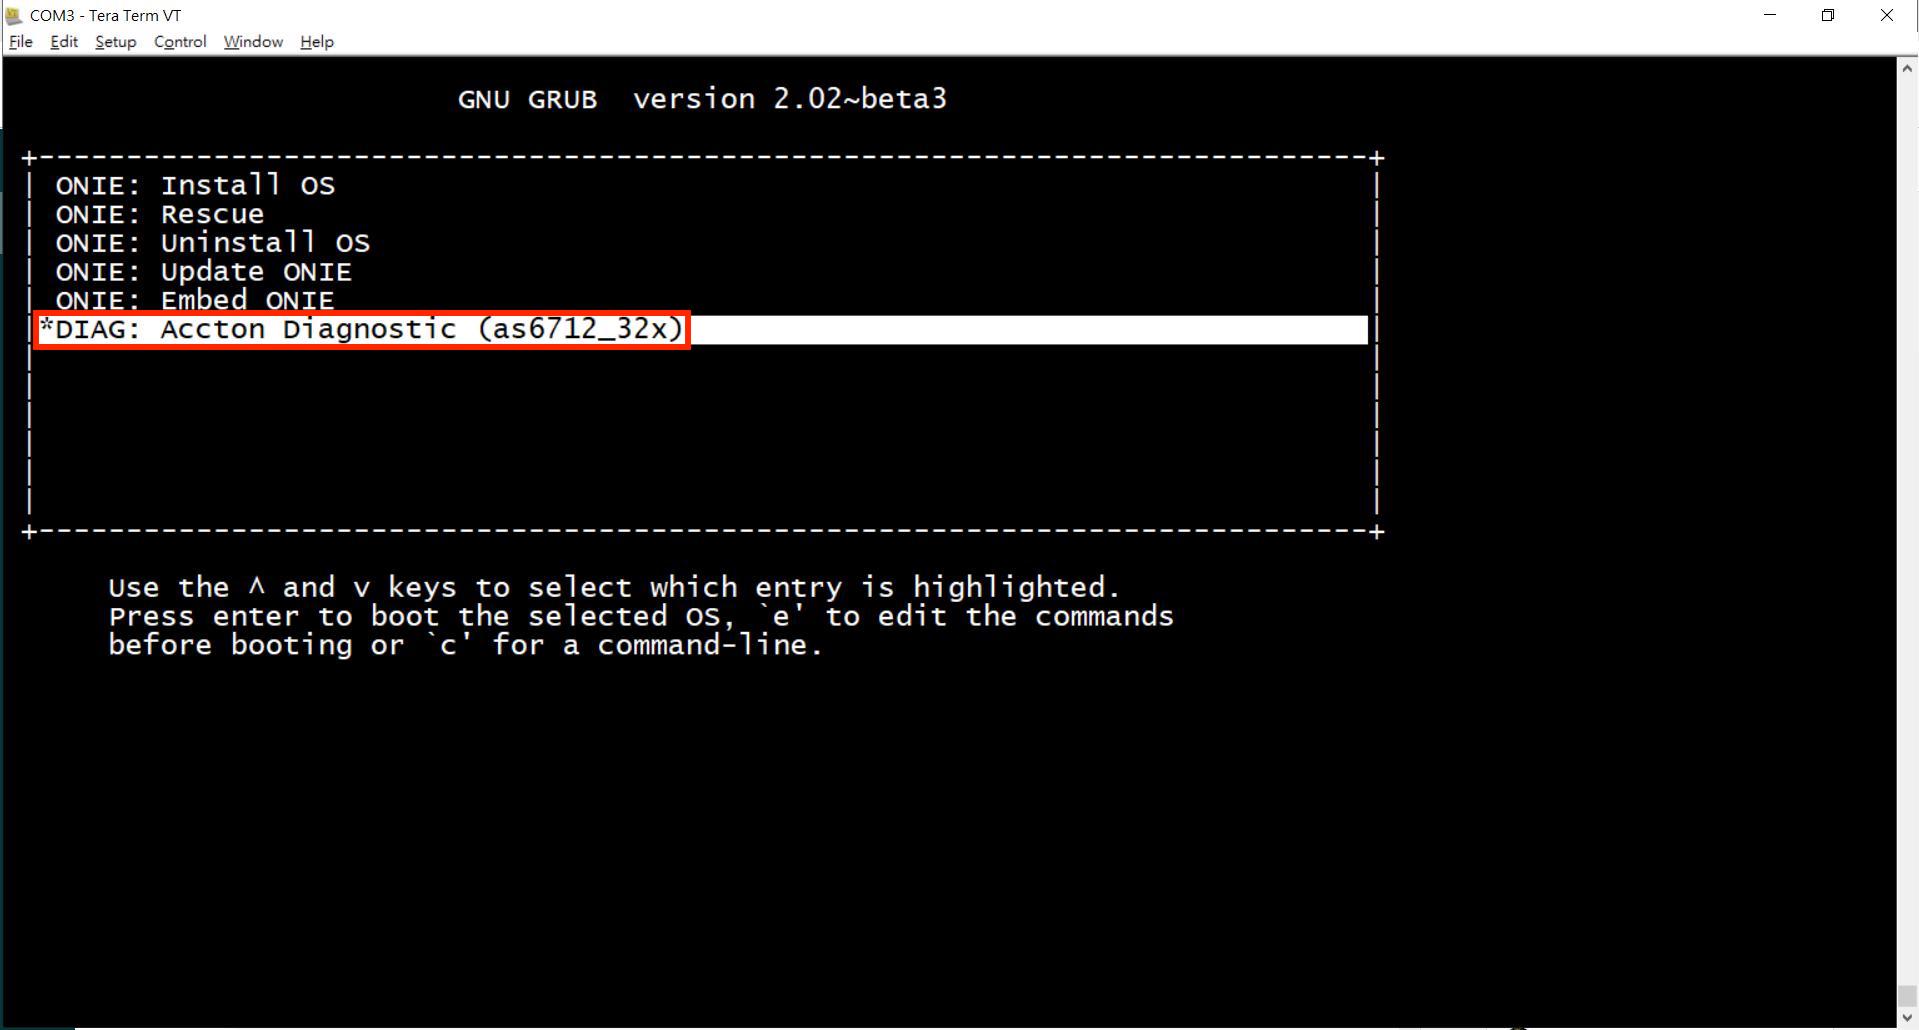
TFTP
1. Please connect to the TFTP server with Mgmt port. (e.g., AS6712-32x)
Note: Please use 1G port.
![]()
2. Set the IP address in ONIE and try to ping the TFTP server. (Server IP: 192.168.0.200)
       ONIE:/ #
       ONIE:/ #
       eth0 Link encap:Ethernet HWaddr CC:37:AB:C4:B1:0C

       inet6 addr: fe80::ce37:abff:fec4:b10c/64 Scope:Link
       UP BROADCAST RUNNING MULTICAST MTU:1500 Metric:1
       RX packets:77 errors:0 dropped:0 overruns:0 frame:0
       TX packets:31 errors:0 dropped:0 overruns:0 carrier:0
       collisions:0 txqueuelen:1000
       RX bytes:7619 (7.4 KiB) TX bytes:7134 (6.9 KiB)
       Memory:dff00000-dff1ffff


       PING 192.168.0.200 (192.168.0.200): 56 data bytes
       64 bytes from 192.168.0.200: seq=0 ttl=128 time=9.675 ms
       64 bytes from 192.168.0.200: seq=1 ttl=128 time=0.517 ms
       ^C
       --- 192.168.0.200 ping statistics ---
       2 packets transmitted, 2 packets received, 0% packet loss
       round-trip min/avg/max = 0.517/5.096/9.675 ms
3. Input "install_url [TFTP location]" command and the installation will start.
ONIE:/ #

4. The system will automatically reboot after installing and then you will see Accton diag in the menu
FTP
1. Please connect to the FTP server with Mgmt port. (e.g., AS6712-32x)
Note: Please use 1G port.
![]()
2. Set the IP address in ONIE and try to ping the FTP server. (Server IP: 192.168.0.200)
       ONIE:/ #
       ONIE:/ #
       eth0 Link encap:Ethernet HWaddr CC:37:AB:C4:B1:0C

       inet6 addr: fe80::ce37:abff:fec4:b10c/64 Scope:Link
       UP BROADCAST RUNNING MULTICAST MTU:1500 Metric:1
       RX packets:77 errors:0 dropped:0 overruns:0 frame:0
       TX packets:31 errors:0 dropped:0 overruns:0 carrier:0
       collisions:0 txqueuelen:1000
       RX bytes:7619 (7.4 KiB) TX bytes:7134 (6.9 KiB)
       Memory:dff00000-dff1ffff


       PING 192.168.0.200 (192.168.0.200): 56 data bytes
       64 bytes from 192.168.0.200: seq=0 ttl=128 time=9.675 ms
       64 bytes from 192.168.0.200: seq=1 ttl=128 time=0.517 ms
       ^C
       --- 192.168.0.200 ping statistics ---
       2 packets transmitted, 2 packets received, 0% packet loss
       round-trip min/avg/max = 0.517/5.096/9.675 ms
3. Input "install_url [FTP account:password@location]" command and the installation will start.
     ONIE:/ # install_url ftp://edgecore:edgecore@192.168.0.200/as6712_32x_onie_diag_
     installer_v1.0.1.2.bin
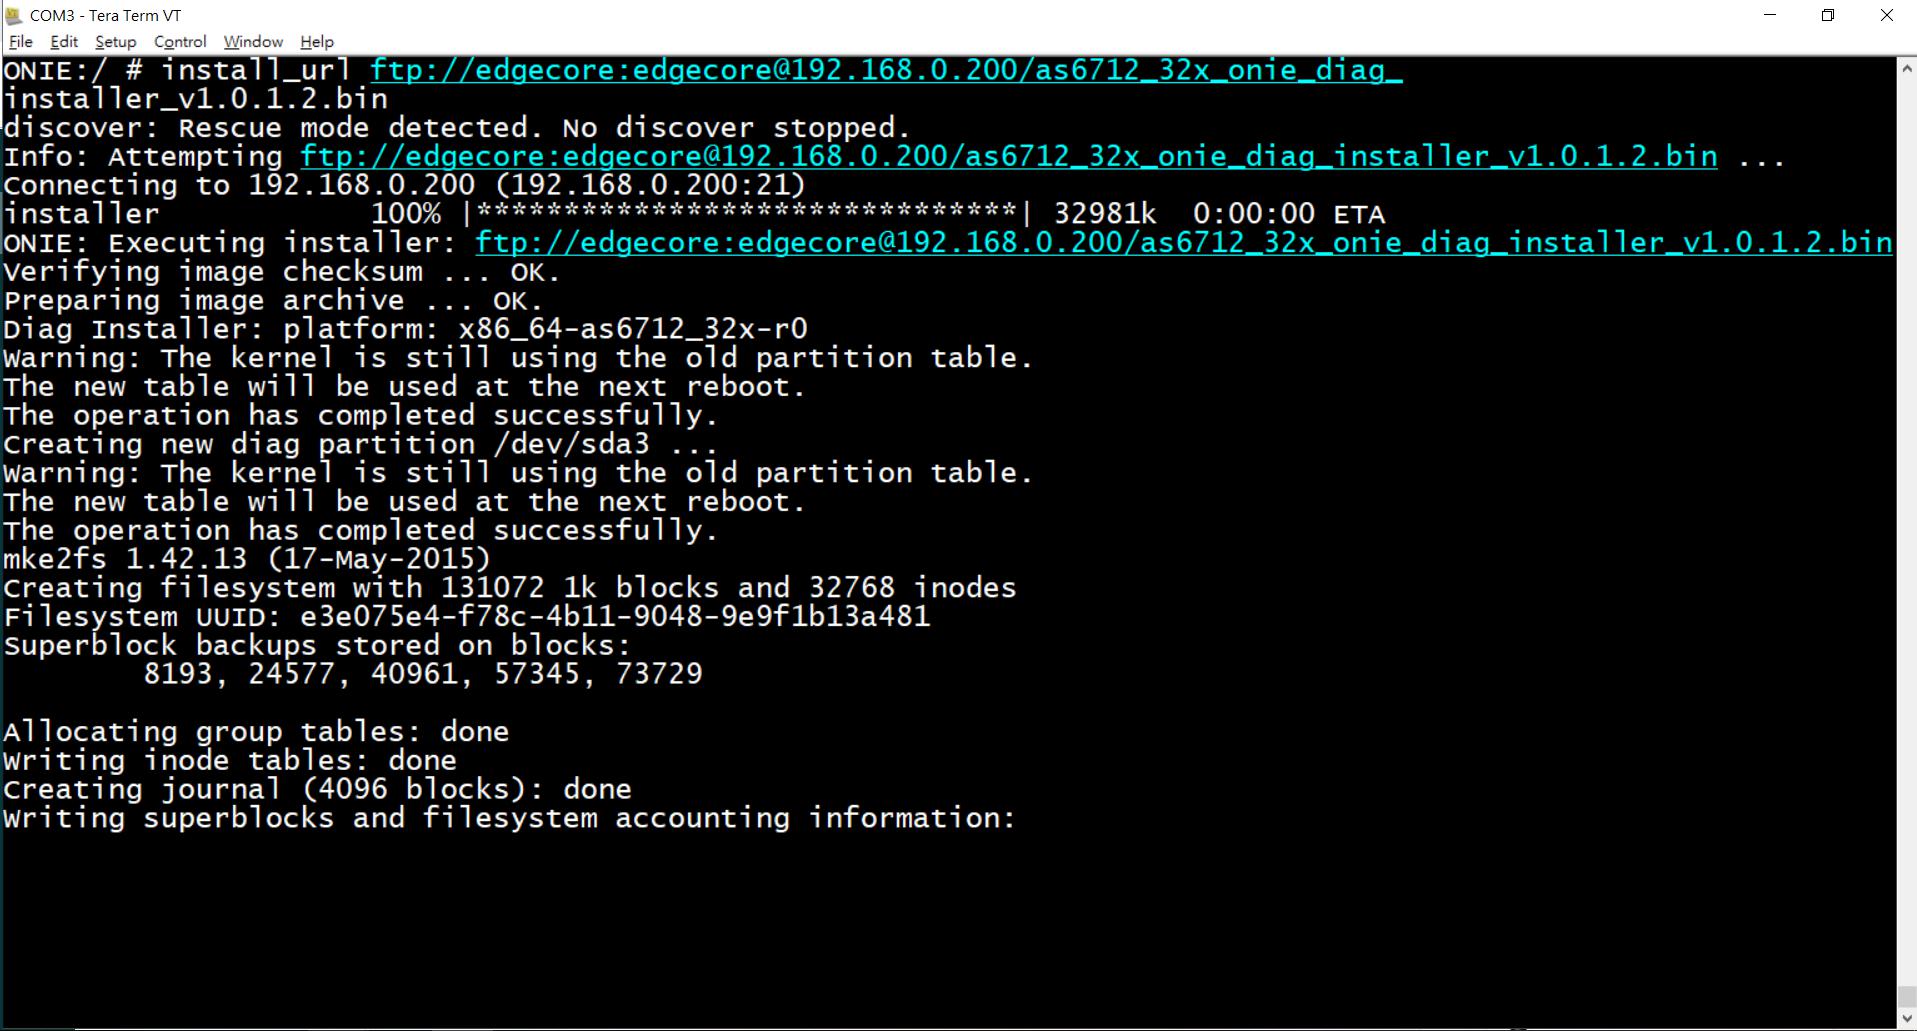
4. The system will automatically reboot after installing and then you will see Accton diag in the menu
HTTP
1. Please connect to the HTTP server with Mgmt port. (e.g., AS6712-32x)
Note: Please use 1G port.

2. Set the IP address in ONIE and try to ping the HTTP server. (Server IP: 192.168.0.200)
       ONIE:/ #
       ONIE:/ #
       eth0 Link encap:Ethernet HWaddr CC:37:AB:C4:B1:0C

       inet6 addr: fe80::ce37:abff:fec4:b10c/64 Scope:Link
       UP BROADCAST RUNNING MULTICAST MTU:1500 Metric:1
       RX packets:77 errors:0 dropped:0 overruns:0 frame:0
       TX packets:31 errors:0 dropped:0 overruns:0 carrier:0
       collisions:0 txqueuelen:1000
       RX bytes:7619 (7.4 KiB) TX bytes:7134 (6.9 KiB)
       Memory:dff00000-dff1ffff


       PING 192.168.0.200 (192.168.0.200): 56 data bytes
       64 bytes from 192.168.0.200: seq=0 ttl=128 time=9.675 ms
       64 bytes from 192.168.0.200: seq=1 ttl=128 time=0.517 ms
       ^C
       --- 192.168.0.200 ping statistics ---
       2 packets transmitted, 2 packets received, 0% packet loss
       round-trip min/avg/max = 0.517/5.096/9.675 ms
3. Input "install_url [HTTP URL]" command and the installation will start.
ONIE:/ # install_url http://192.168.0.200/as6712_32x_onie_diag_installer_v1.0.1.2.bin
4. The system will automatically reboot after installing and then you will see Accton diag in the menu.
SCP
1. Please connect to the OpenSSH server with Mgmt port. (e.g., AS6712-32x)
Note: Please use 1G port.
![]()
2. Set IP address in ONIE and try to ping the OpenSSH server. (Server IP: 192.168.0.100)
       ONIE:/ #
       ONIE:/ #
       eth0 Link encap:Ethernet HWaddr CC:37:AB:C4:B1:0C

       inet6 addr: fe80::ce37:abff:fec4:b10c/64 Scope:Link
       UP BROADCAST RUNNING MULTICAST MTU:1500 Metric:1
       RX packets:77 errors:0 dropped:0 overruns:0 frame:0
       TX packets:31 errors:0 dropped:0 overruns:0 carrier:0
       collisions:0 txqueuelen:1000
       RX bytes:7619 (7.4 KiB) TX bytes:7134 (6.9 KiB)
       Memory:dff00000-dff1ffff

       ONIE:/ #  PING 192.168.0.100 (192.168.0.100): 56 data bytes
       64 bytes from 192.168.0.100: seq=0 ttl=64 time=0.705 ms
       64 bytes from 192.168.0.100: seq=1 ttl=64 time=0.433 ms
       ^C
       --- 192.168.0.100 ping statistics ---
       2 packets transmitted, 2 packets received, 0% packet loss
       round-trip min/avg/max = 0.433/0.569/0.705 ms
3. Use the "SCP" command to copy the diag installer from the SSH server.
scp [account@server ip]:[installer_file_path] [local_path]
       ONIE:/ # scp jeff_cheng@192.168.0.100:/Users/jeff_cheng/Desktop/ISO/6712-32x/DIA
       G/as6712_32x_onie_diag_installer_v1.0.1.2.bin /tmp

       Host '192.168.0.100' is not in the trusted hosts file.
       (ecdsa-sha2-nistp256 fingerprint md5 be:26:8f:8c:2f:26:69:f5:05:7e:30:d2:d2:01:e0:92)
       Do you want to continue connecting? (y/n) y
       jeff_cheng@192.168.0.100's password:
       as6712_32x_onie_diag_installer_v1.0.1.2.bin 100% 32MB 16.1MB/s 00:02
4. Install the Diag by "install_url [installer]" command.
       ONIE:/ #
       ONIE:/tmp #
       as6712_32x_onie_diag_installer_v1.0.1.2.bin
       ONIE:/tmp #
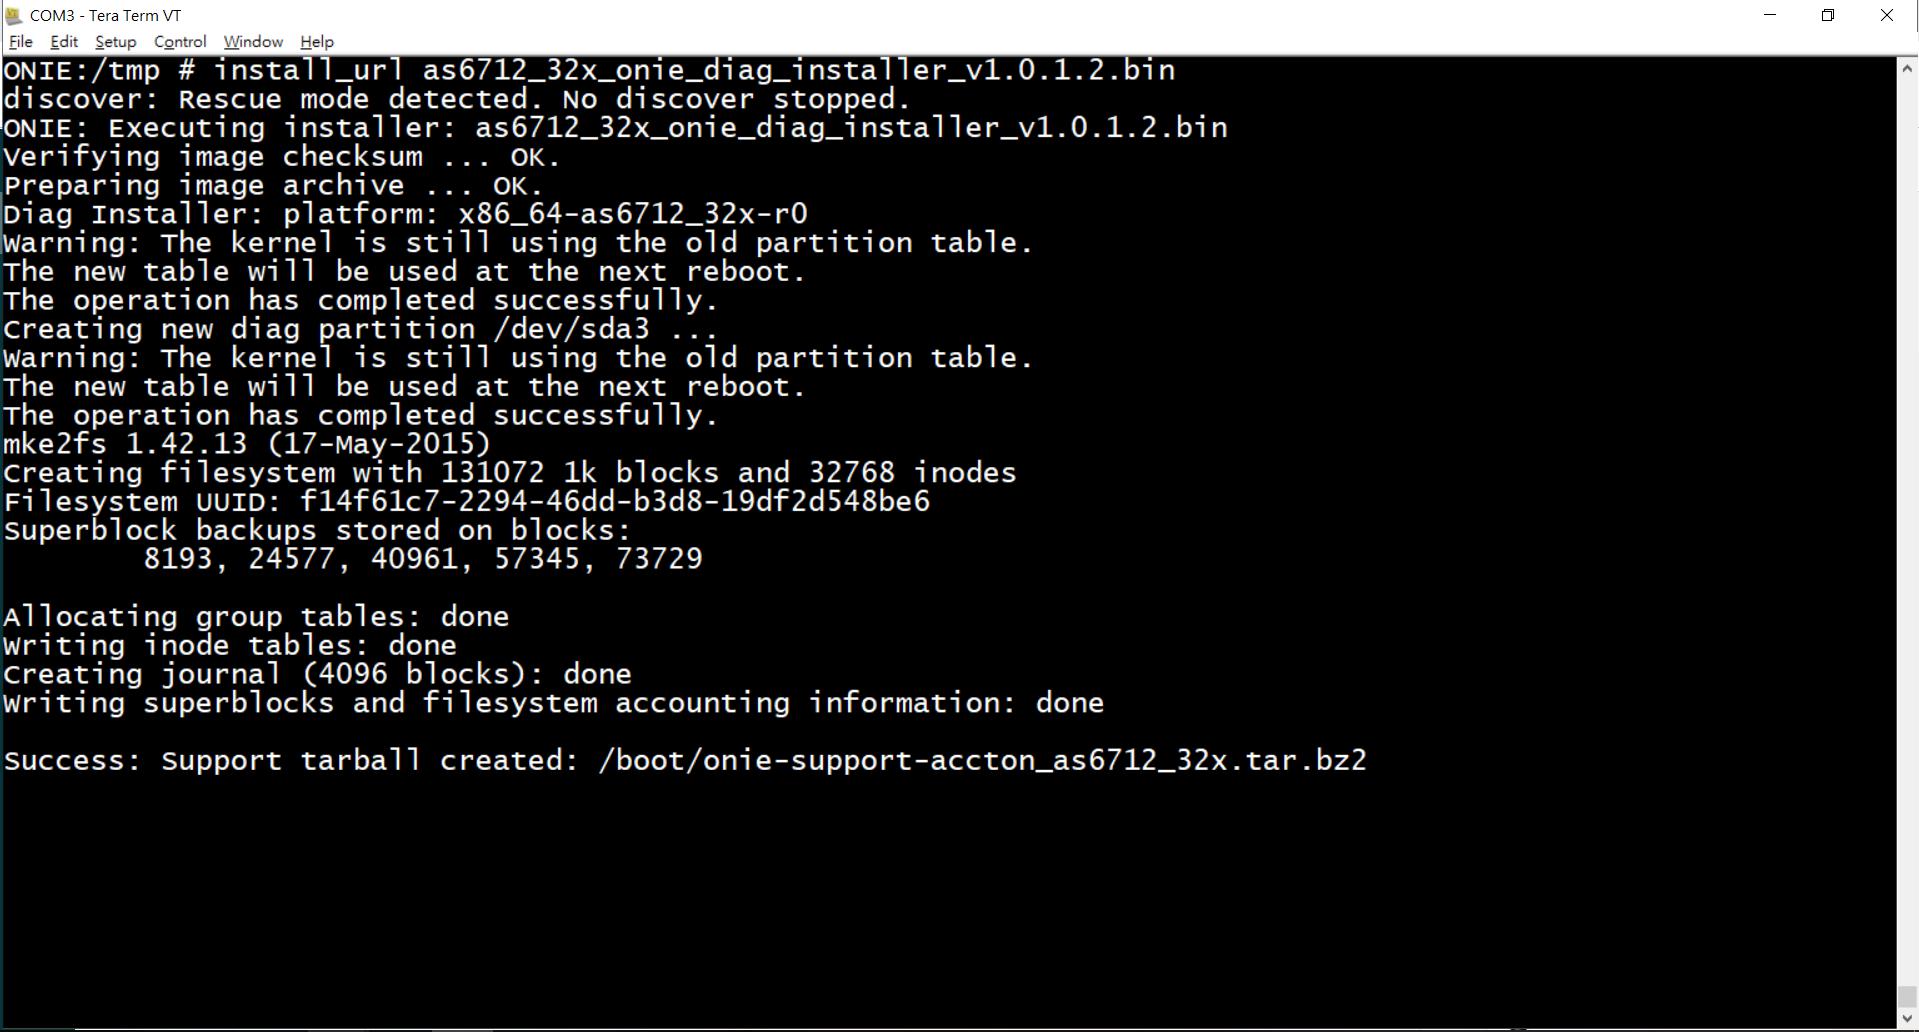
5. The system will automatically reboot after installing and then you will see Accton-Diag in the menu.
Prev Page [ONIE]How to check your SSD type?
Next Page [ACCTON Diag.] How to test hardware function in the power pc platform