Purpose:
This post shows the procedures to recover ONIE on x86 platform switch via USB Drive.
Model:
AS5712-54X
AS5812-54X,AS5812-54T
AS5912-54X
AS5916-54XL, AS5916-54XKS
AS6712-32X
AS6812-32X
AS7712-32X
AS7816-64X
Preparation:
A. Personal computer:
B. Storage Device:
USB Drive * 1 (Please check that the USB drive with a minimum size of 256M and need to back up any files you want to keep.)
C. Serial Console cable:
A cable which attached in the original box.
D. Burning tools:
Windows: Win32 Disk Imager
MacOS: "dd", Coreutils
Linux: "dd", Coreutils
E. ISO Image:
Download the ONIE ISO image for your own device.
Reference: How to download the current firmware?
F. A console terminal
Putty,Teraterm,SecureCRT,etc...
Procedure:
STEP1. Burn the ONIE ISO file to the USB drive. (Please choose the operating software you need)
Windows:
1. Insert the USB drive to your PC or laptop.
2. Double click the application icon.

3. Select the device which you insert in. (e.g., E:\)

4. Click the file icon.

5. Select the filename extension to "*".

6. You will see the ISO image file and then open it.

7. Select "write" icon to burn the ISO to the USB drive.

8. There will be a message popping up, just click yes then start burning.

9. You will see the successful message while the process is done.

MacOS:
1. Insert the USB drive to iMac or Macbook.
2. Input "diskutil list" command on terminal to check the local disks and volumes. (e.g., /dev/disk2)
jeff-chengde-MacBook-Pro:jeff_cheng$
 /dev/disk0 (internal):
 #: TYPE NAME SIZE IDENTIFIER
 0: GUID_partition_scheme 1.0 TB disk0
 1: EFI EFI 314.6 MB disk0s1
 2: Apple_APFS Container disk1 1.0 TB disk0s2

 /dev/disk1 (synthesized):
 #: TYPE NAME SIZE IDENTIFIER
 0: APFS Container Scheme - +1.0 TB disk1
 Physical Store disk0s2
 1: APFS Volume Macintosh HD 144.5 GB disk1s1
 2: APFS Volume Preboot 45.2 MB disk1s2
 3: APFS Volume Recovery 522.7 MB disk1s3
 4: APFS Volume VM 5.4 GB disk1s4
3. Umount the disk with "diskutil umount [disk location]" (e.g., /dev/disk2)
jeff-chengde-MacBook-Pro:jeff_cheng$
Volume FDisk_partition_scheme on disk2 unmounted
4. Start burning the ISO with "sudo dd if=[.ISO file location] of=[disk location]" command.
jeff-chengde-MacBook-Pro:jeff_cheng$
41216+0 records in
41216+0 records out
21102592 bytes transferred in 23.526439 secs (896973 bytes/sec)
Linux:
1. Insert the USB drive to the personal computer.
2. Input "fdisk -l" command on terminal to check the local disks and volumes. (e.g., /dev/sdc)
root@jeff-D520MT-K:~#


 7.4 GiB, 7918845952 bytes, 15466496 sectors
Units: sectors of 1 * 512 = 512 bytes
Sector size (logical/physical): 512 bytes / 512 bytes
I/O size (minimum/optimal): 512 bytes / 512 bytes
Disklabel type: gpt
Disk identifier: DB507D64-8A6E-4250-8AD7-45EECE4B4971
3.Umount the disk with "umount [disk location]" (e.g., /dev/sdc)
root@jeff-D520MT-K:~# umount /dev/sdc2
4. Start burning the ISO with "sudo dd if=[.ISO file location] of=[disk location]" command.
41216+0 records in
41216+0 records out
21102592 bytes (21 MB, 20 MiB) copied, 3.22522 s, 6.5 MB/s
STEP2. Insert the USB drive to the data center switch. (e.g., AS6712-32X)

STEP3. Plug in the console cable into the console port. (e.g., AS6712-32x)

STEP4. Open the terminal. (e.g., Teraterm)
Note: Please set the baud rate as 115200
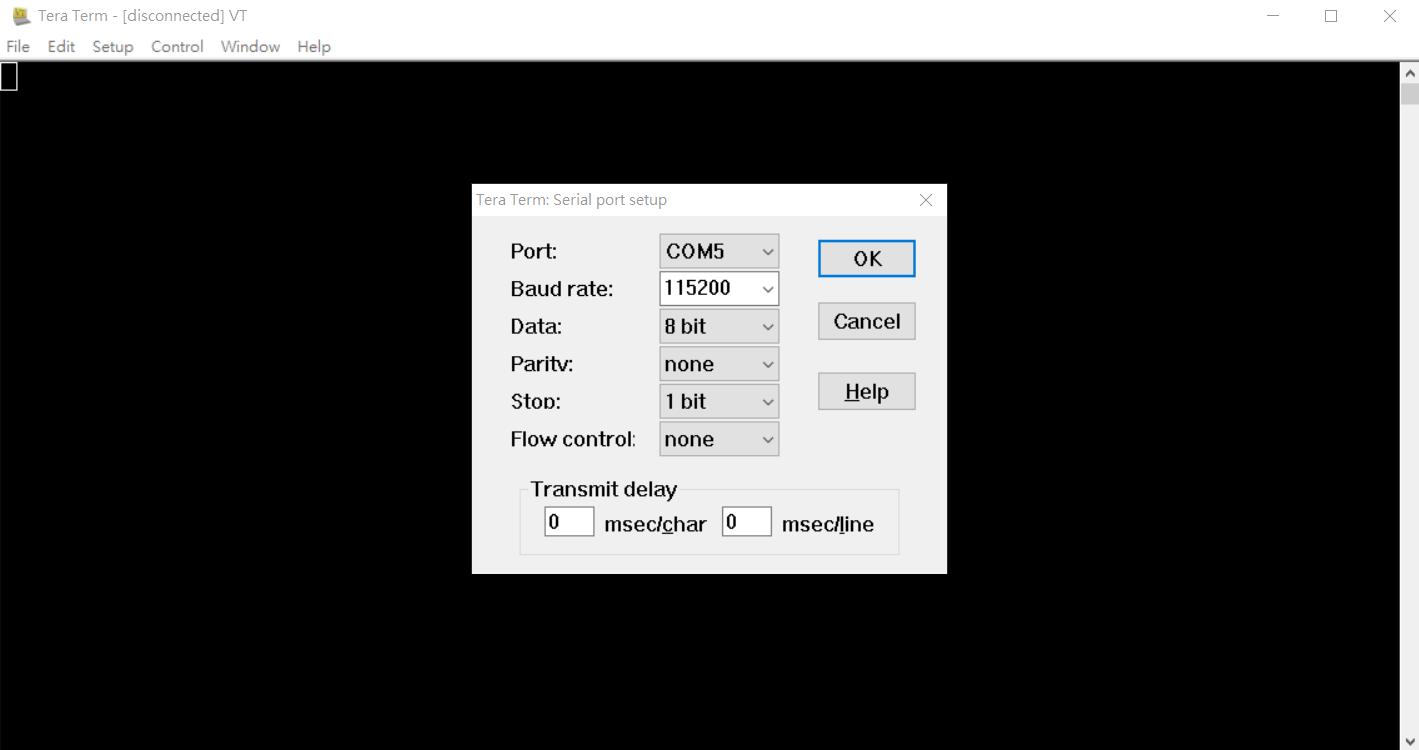
STEP5. Power on the data center switch, wait for a few seconds and press "ESC" to enter the BIOS setup.

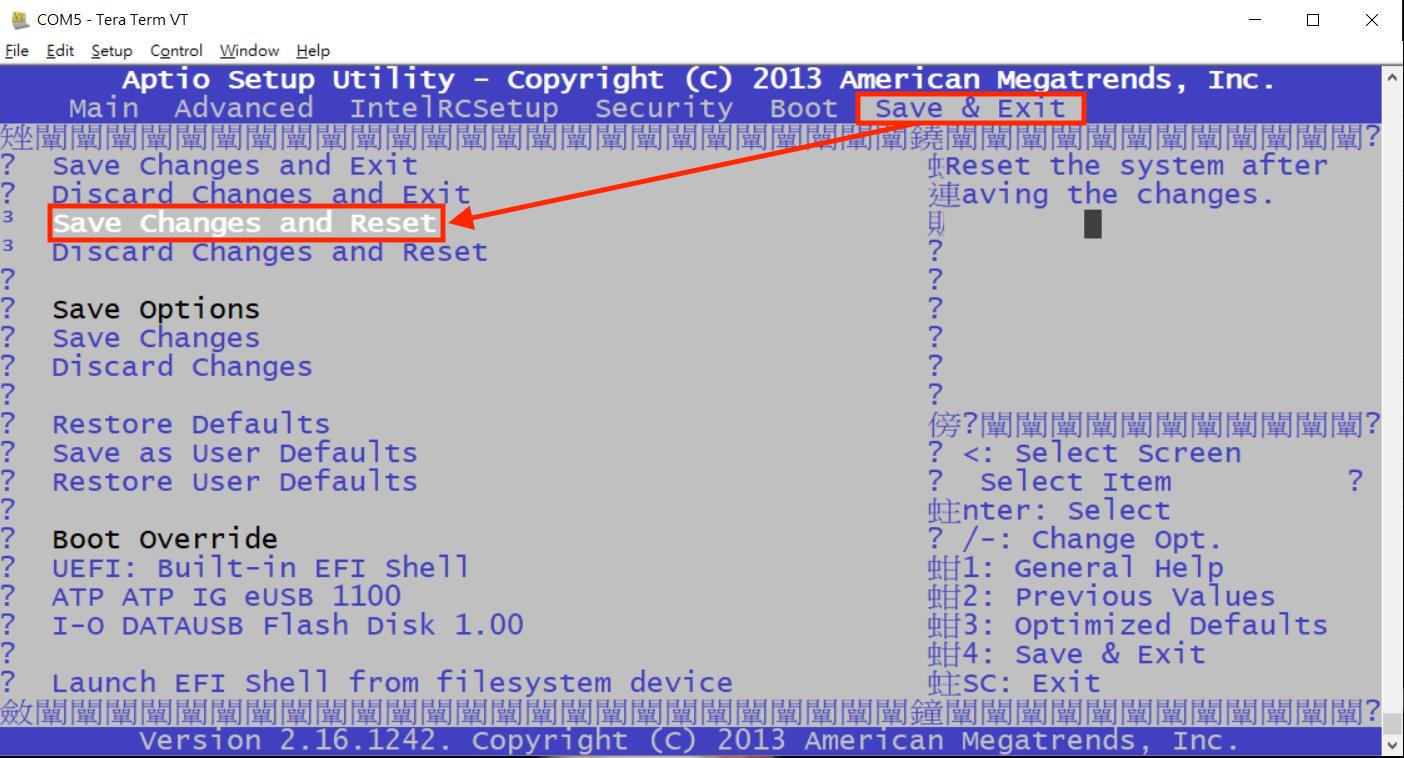
STEP6. Go to the Boot section and select the USB drive as boot option #1. (e.g., I-O DATAUSB FLASH DRIVE)

STEP7. Go to Save&Exit section, select "Save changes and Reset"
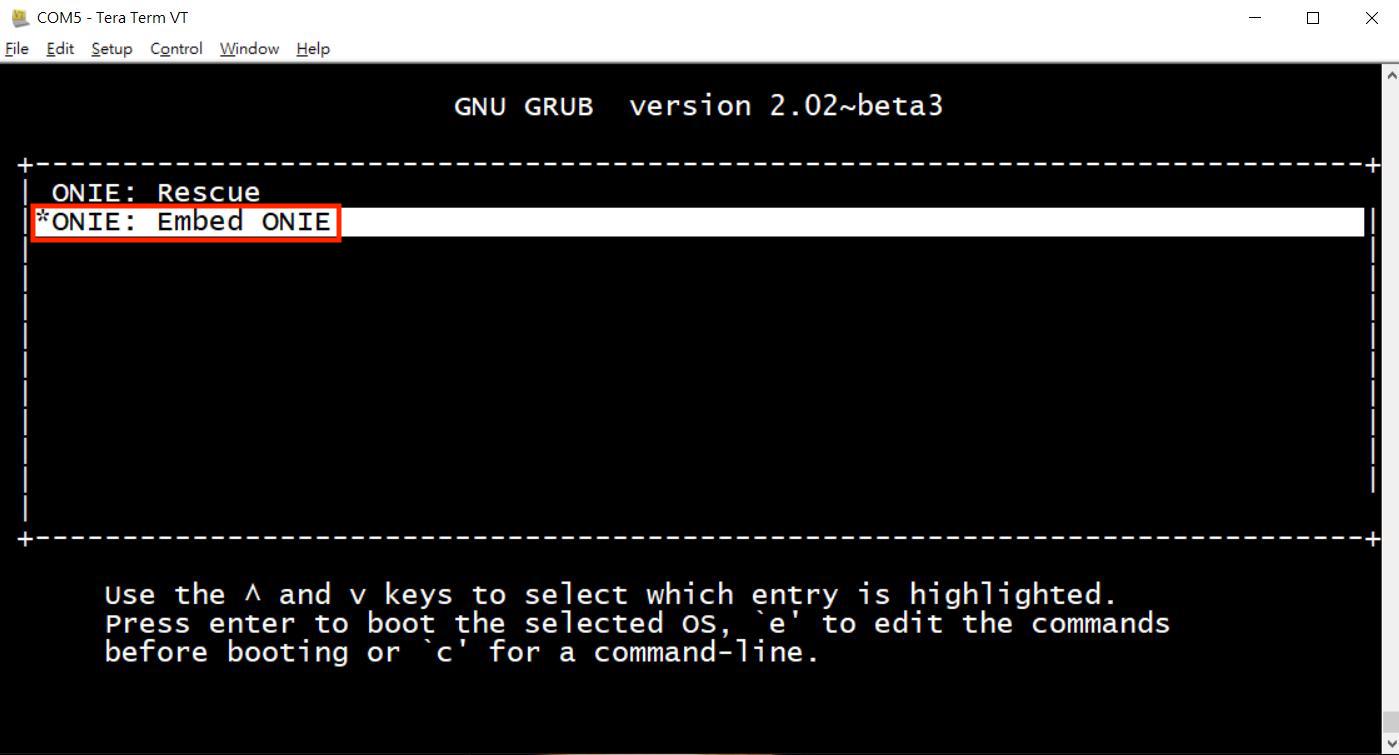
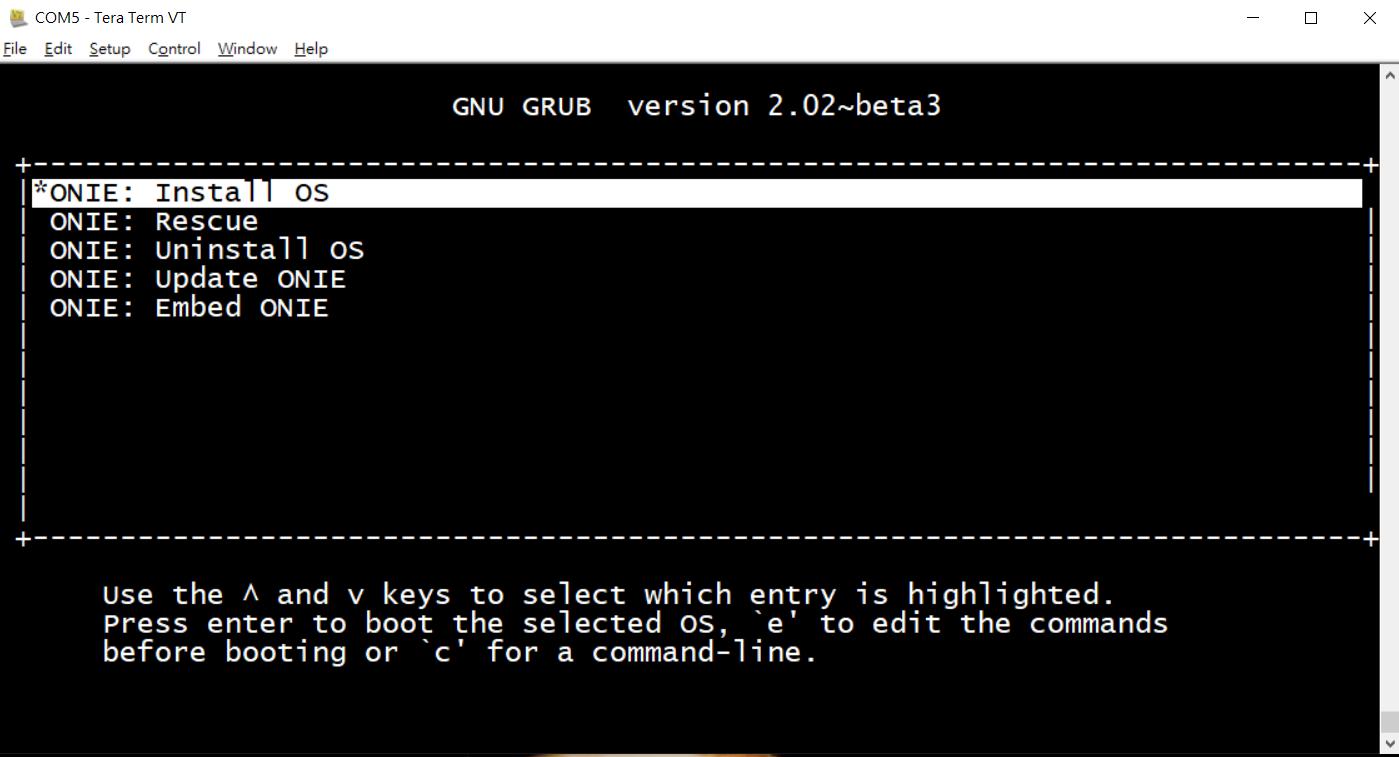
STEP8. Wait for the reset time and the ONIE Installer screen will pop up, select "ONIE: Embed ONIE", the system will start to reinstall the ONIE.
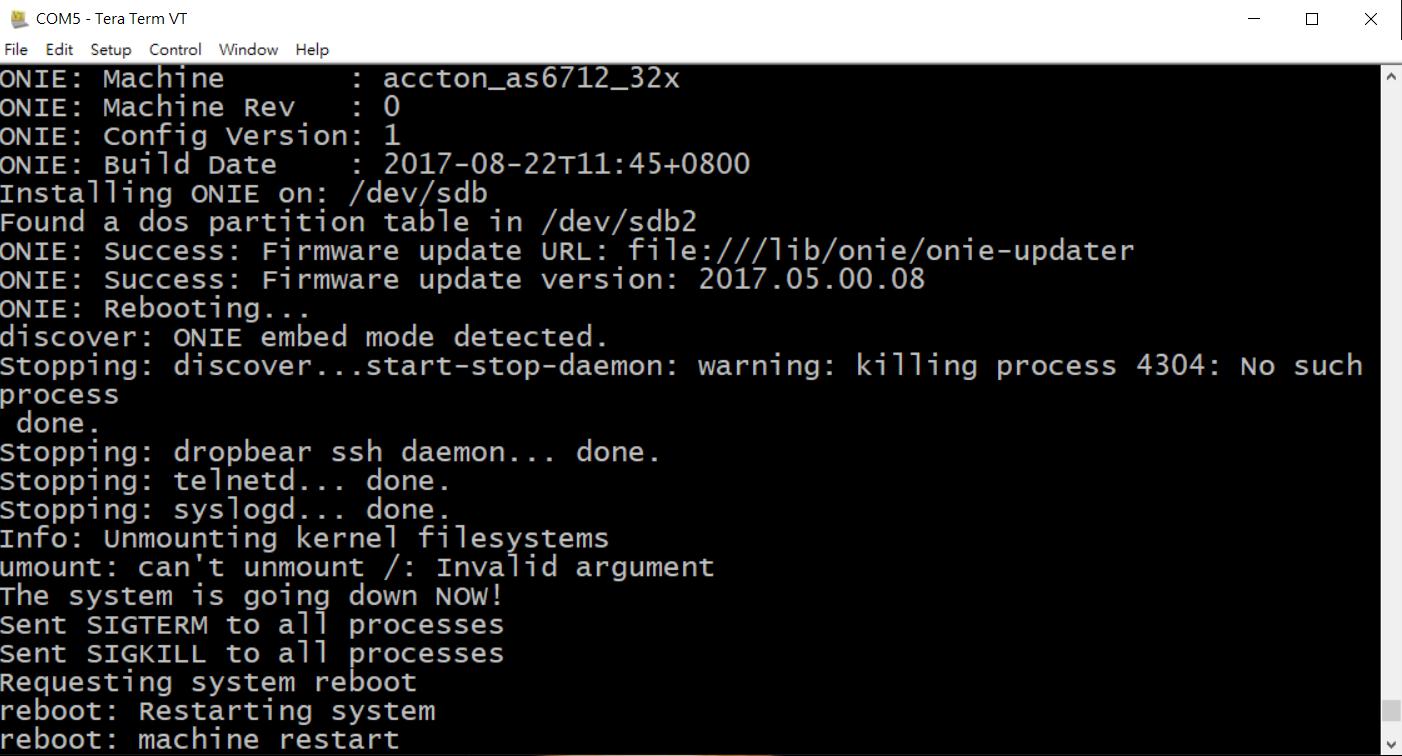
STEP9. When showing the "Installing ONIE on:/dev/sdx", the installer is almost complete. (e.g., /dev/sdb)

STEP10. The system will reboot after completion.
STEP11. Please follow STEP5 to go into BIOS again.

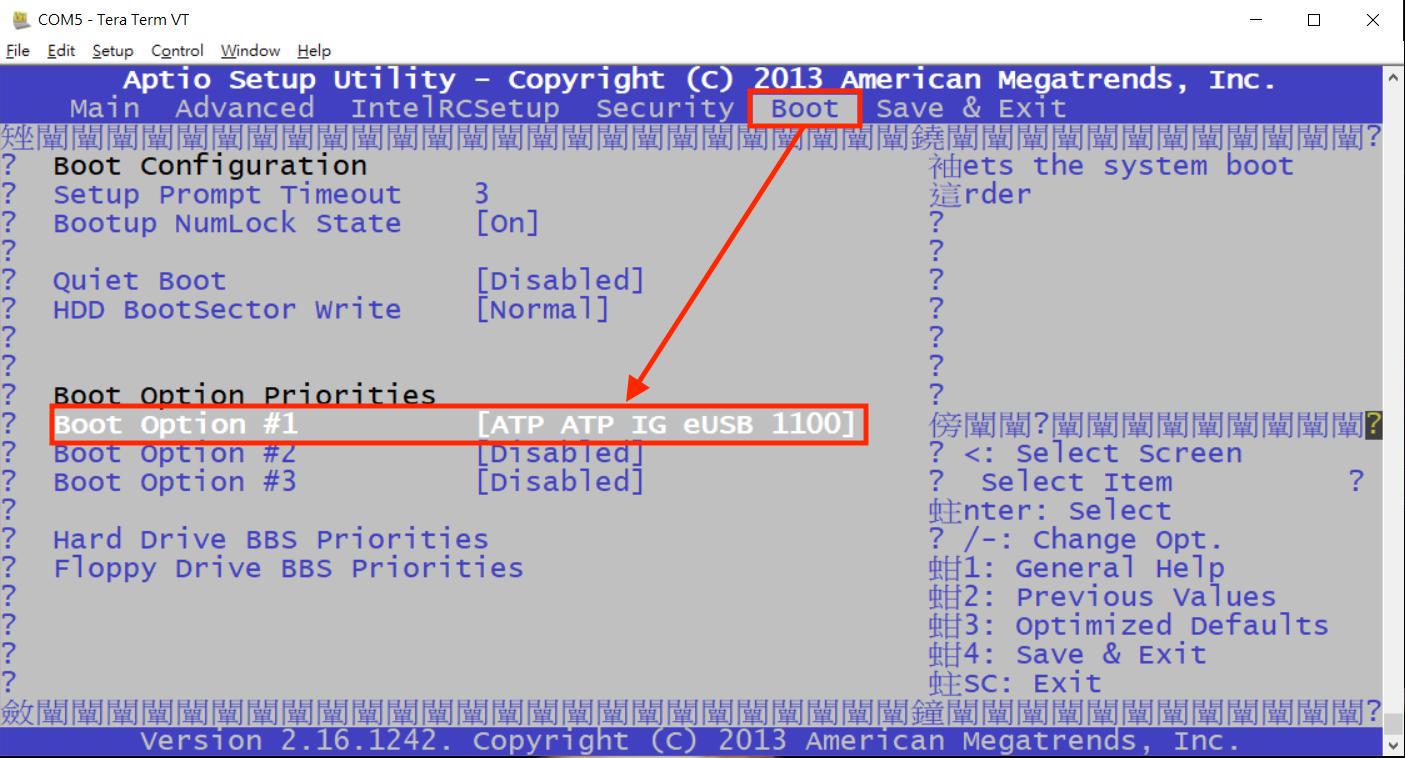
STEP11. Go to the Boot section and select the FLASH drive as boot option #1. (e.g., ATP ATP IG eUSB 1100), now you can remove the USB drive.
Note. Edgecore switch has two kinds of storage drives, eUSB or mSATA. Therefore, your switch's FLASH model name might be different from the following picture.
STEP12. Go to "Save & Exit" section, select "Save changes and Reset"

STEP13. ONIE is recovered.
Prev Page [ONIE] How to recover ONIE on ARM platform switch via TFTP?
Next Page [ONIE] How to recover ONIE on x86 platform switch via PXE?
